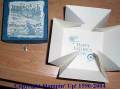
Finally, I have a chance to share these.
I started with an initation size envelope and by folding the 3 sides and inverting them, you getthese cute purses
Date: Friday, June 11, 2004 GMT Views: 5795
Favorited:82
Additional Info
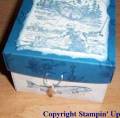
Stamps: love without end
Ink: one is not quite navy,mellow moss, and more mustard and the other is ballet blue, really rust, and mellow moss
I love this purse card. I was looking for an easy one to teach to some girls for an activity at church. But, I don't undrstand the directions either. Can you go step by step?
Thanks.
Registered: April 8, 2004 Location: Austin, TX Posts: 4857
Fri, Jun 11, 2004 @ 2:15 PM
off to make some, I think these are so much cuter and more fun than the regualr bagalope, never would have thought ti!
must go get more buttons!!!
------------------------------ Melanie
Illustrator and Designer for Gina K Designs/StampTV
Author of "Fabulous Stamped frames" and A Year of Flowers", published by Annie's
Please visit my blog "Hands, Head, and Heart" at: http://melaniemuenchinger.blogspot.com/
Check out my Youtube channel for stamping and cardmaking videos: https://www.youtube.com/user/MelanieMuenchinger/videos
Registered: January 5, 2004 Location: Brooklyn, WI Posts: 5465
Fri, Jun 11, 2004 @ 4:39 PM
Darling! Sorry I've been out of the loop the last couple of days. Too busy! NOW, I am on vacation for 9 days! YIPPPPPPPYYYYY! Anyways, I love your little purse! Lana
------------------------------ Lana Lepinski Basement Stamper
Registered: January 4, 2004 Location: Baton Rouge, LA Posts: 216
Fri, Jun 11, 2004 @ 5:10 PM
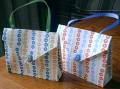
These are similar to the bagalops except she is using a small envy. You simply fold the left side in a few inches (maybe even a 1/4" to 1/2")and smooth with your boning tool, then bend over and fold the opposite direction. Then simply straighten out the fold so the evny is flat again. Now take the left side of the envy and fold it in, having it bend at the two creases you made on the front and back from the fold. does this make sense? OH! Take a look at the sides of a paper sandwich bag or a big paper grocery bag, this is the effect you are after.It's really easy if you try. These are simply adorable!!! Great idea for my upcomig Stampers 10 club! ~ Melanie
as you wish! The first time I did these, I had a mess. I was licking the envelope shut. Do not do that. I will try to make this as painless as possible.
It is one of those projects that when you see it done it makes perfect sense but when you go by directions only, it is difficult to figure out.
They really are simple to do once you get the folding down pat.
Directions:
Stamp both sides of envelope(can be any size, I used invitation size)
Open flap on envelope.
Score the 2 sides and bottom 1/2"-3/4" it is your choice. ( I did 3/4")
ALL SCORES MUST BE THE SAME WIDTH! (Larger folds for larger envelopes)
Fold scores both directions to make a strong crease.
Put hand inside envelope and push the sides in like gussets and flatten the bottom.
You will have 2 small triangles in the bottom corners. Fold them under and tape.
Fold the envelope flap over on the top (part you would lick to seal)and put a small piece of velcro at the V closure to keep it shut.
punch 2 half-circles at the top and thread a piece of ribbon through the holes and knot each end on the inside. Tape if needed
If this still does not make sense, let me know.
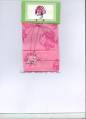
Maybe a different view or picture of it would help some of you.