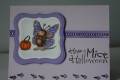
The challenge is to use bling on our CAS card so I added some clear gems to the punched lace.
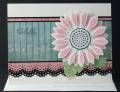
There are only three layers to the designer paper and black and to make it look like four I cut small strips and glued them on each side of the striped paper. This saves cardstock and cuts down on bulk and weight for mailing.
I sponged the flower before it came out the die cut.
The black edge around the center is cut freehand.
This pack of paper came with a cardstock piece of packaging and it worked great to use a couple pieces for the leavesÂ…but there wasnÂ’t much open space for them so one had wording on it which I cut off and just tucked it further under the flower.
THE ENVELOPE: Look close and you'll see! The MS punch wonÂ’t work for me on heavy cardstock so I punched two thin cardstocks and layered them together. I cut them the width of the envelope, slipped them inside so the embossing is across the bottom. I then ran them through the Cuttlebug using this layering system: A plate, B plate shimmed for Nestabilities, tan polymer Spellbinder mat, B plate. The envelope goes into the machine bottom first and I only emboss the bottom portion to avoid getting envelope markings on the front where the piece join together on the back, to do this I roll it in and reverse to roll it out againÂ…I do hope that makes sense to you.
ThatÂ’s it and now youÂ’ve got a nice embossed envelope to match the card with very little effort! Save that punched template to use over and over again.
Date: Monday, August 10, 2009 GMT Views: 966
Favorited:7
Wonderful card, Roxie! I LOVE that flower! I may have to order that Shapeabilities--now don't you feel guilty being an enabler! The double border and bling are really pretty!