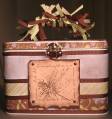
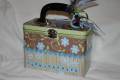
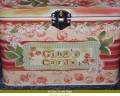
This is the first time I've tried Mod Podge on a lunch tin (because of MamaK and OE). I had a hard time with it on a clipboard but found it pretty easy to work with on this tin. This tin holds cards for my Sunday School class to send well wishes to those we haven't seen in awhile - Counterparts is the name of the class - so that's what it says at the bottom. I added a little bling by putting clear crystal rhinestones in the centers of the punched flowers.
Date: Saturday, June 10, 2006 GMT Views: 1731
Favorited:25
Registered: June 19, 2004 Location: Lancaster, OH Posts: 31
Sun, Jun 11, 2006 @ 10:51 AM
Hi Jami, Your box is so cute! I do have a question about the Mod Podge. Do you use it like glue or do you cover over the outside of the paper to coat it for protection? Thanks!!!
Registered: March 9, 2005 Location: OH Posts: 28551
Sun, Jun 11, 2006 @ 7:24 PM
Jami, This is awesome...........love the rhinestones and the ric rac.
------------------------------ My Blog- Trusting in the Lord for Everything Proverbs 3:5-6 Trust in the Lord with all your heart and lean not on your own understanding. In all your ways acknowledge Him and He will make your path straight. My Stampin' Up WebsiteMy Gallery, BRAK New Member Mentor. New Grandmother to Mia Lou. 1st Grandchild.
Registered: June 9, 2004 Location: SoCal Posts: 62020
Sun, Jun 11, 2006 @ 9:59 PM
In answer to the questions about the Mod Podge application - I used a foam brush and applied mod podge to the tin and let it sit for a couple of minutes. I also applied it to the back of the paper before attaching it to the tin. I then let everything dry 15-30 minutes and put a coat of Mod Podge all over as a sealer. I'm not very experienced with Mod Podge, but I had read suggestions here at SCS. It worked well and pretty easily.