Registered: December 4, 2004 Location: Western Massachusetts Posts: 1991
Tue, Mar 29, 2005 @ 7:50 PM
This is beautiful!!
------------------------------ Jeanne K.
When will Red Riding Hood receive her first Kiwi Kiss? And who ate Chocolate Chip?!??? Find out on the next exciting episode of.... As the Stamp Caddy Turns(my gallery)
Registered: July 17, 2004 Location: Lancaster, CA Posts: 1803
Fri, Apr 01, 2005 @ 9:17 PM
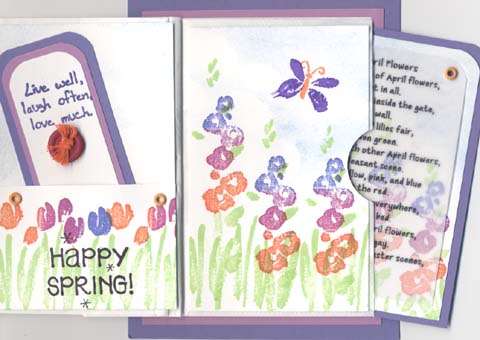
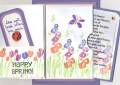
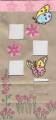
Hello ladies: I'll try to explain this little bag card. I got a bag of sacks at Michael's. They are called Li'l Craft Sacs. They are 8 5/8" long by 4 11/16" wide. To make the card balance I cut it to 7" in length. Now, fold paper bag in half. It should be 3 1/2" wide and 4 11/16" tall. I punched (4) 1/8" holes down the folded side of the paper bag (1/2" from the edge). I took a piece of Orchid Oppulence 3 3/4" x 5" and mono'd the folded bag to it. Then I punched the four eyelet holes through the bag & orchid oppulence. I hammered (4) lovely lilac eyelets through both pieces holding them permenantely together. Then I took some SU narrow organdy (Orchid I believe) and tied a pretty knot between the two sets of eyelets. For the front of the bag I cut a piece of white cardstock 2 7/8" x 4 1/2". I stamped my art work using Spring Garden and the cloud templete. I used the celebration spectrum pad for the flower tops, green galore for the flower stems and bliss blue for the clouds. The butterflies are lovely lilac and only orange markers. Now tie a little knot in the Orchid narrow organdy and place the knot in the center of the flower stems and adhere on the back of the art work. Mono onto the front of the bag. OPEN THE BAG. On the left page I cut a piece of white cardstock 2 3/4" x 6 1/2". I then scored at 4 1/2" and folded the two inches up and attached two orange eyelets at both corners, this makes a cute little pocket. I continue with the Spring Garden stamp set and cloud stencil. I made a book mark using white cardstock measuring 1 3/16" x 3 9/16". Corner round the top corners. Layer onto an orchid oppulence layer measuring 1 5/16" x 3 10/16", corner round the top corners. Stamp the "Live well, laugh often, love much, in Lovely Lilac craft ink and emboss with clear EP on the white layer. Add a colored button and tie with colored string. Now layer onto lovely lilac measuring 1 5/8" x 4" and corner round the top corners. You now have a book mark for your pocket. On the right side of the card I decorated a piece the same size as the front white cardstock 2 7/8" x 4 1/2". With a circle punch I punched a half circle on the right open edge of the white bag. That is so you can see the pretty poem inside the open end of the bag. I printed a Spring Poem on white vellum cardstock. I cut it to 3 7/8" tall by 2" wide. Use the corner rounder on the top corners. I layered that onto white cardstock that was stamped with the spring garden set. It measures 4 1/4" tall x 2 5/8" wide. Round the corners and attach vellum poem with two orange eyelets. Layer this all onto lovely lilac that measures 4 1/2" tall by 2 7/8" wide. I found the poem on the internet. I am going to be doing two classes with this and changing the poem to a Mother's Day Poem. If anyone wants the spring poem email me and I'll email it to you. It was quite lovely and goes with the colors of a garden and this card. I hope this all makes sense. It was rather time consuming. Email me with questions. Thanks for your compliments. Rozie