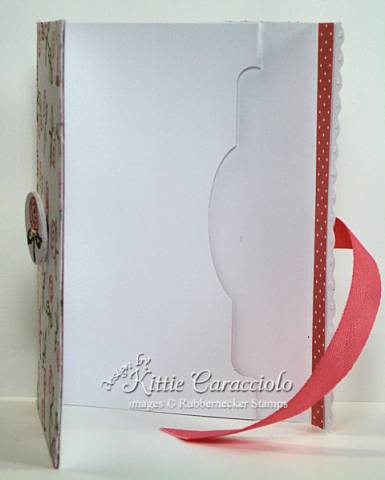
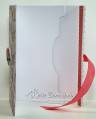
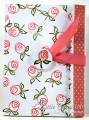
I did some a little different than what was shown on the tutorial. I got into a little trouble but know how to remedy that on my next one. I decided I wanted a little eyelet wallet type flap to come from the back of the card and to fold over the front. I love the polka-dot paper and thought it would be a nice contrast to a simple little rose pattern created with a flower from the Rubbernecker KK Originals Flower Collection. (www.rubbernecker.com)
I used a coral and olive marker to ink the image and stamped repeatedly to create a pretty and delicate pattern. I wanted to have ribbon coming from the back of the folder to go around a button. I stamped the image and cut it out with my small circle punch. I mod podged that circle to three othercircle layers to form a button. I added holes and sewed the button onto the card front. I covered the sewing on the inside with another full sized piece of plain white cardstock. I created the eyelet wallet flap, by scoring my cardstock, cutting with scalloped scissors, piercing eyelet holes and adding the polka dot strip. I adhered my twill to the inside flap of the holder and then I adhered the back of the flap on the inside layer of the card and adhered the gift card folded layer over the flap. This was a fun project. I made a few mistakes but that is how we learn.
Stamps: Rubbernecker KK Originals Flowers
Paper: White, Papertrey Designer Paper
Ink: I used Olive and Coral markers directly on the stamp
Accessories: Scalloped Scissors, Needle, Upholstery Thread, Oval and Word Punch, Twill