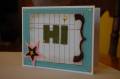
My monster panel ended up bigger than I planned for this layout but I like it anyway!
Here’s my monster measurements: 1” cut off the bottom, The image panel before borders: 2 ¾” x 4 ½”.
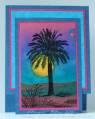
This palm image is one of six including a cactus to be released this month in the Asela line from Cornish Heritage Farms. I have the honor to play with a few now, thanks Asela!
This is a link to the Ranger ink, I always get asked what it is and this will save me some steps. No - I don't work for them in any way! Big and Juicy Ink Pads by Ranger
I punched a circle for the sun from a post it. I cut a wavy line on a post it to mask off the ground area. Cut the post it in half so there is sticky on both pieces because you will use both of them later.
Using a brayer I inked up from the yellow end of a Happy Birthday multi colored Big and Juicy ink pad from Ranger.
I brayer straight across and pick up the brayer and take it back across the card and brayer again, re inking the brayer a few times. But before reaching the desired depth of sky color I remove the sun mask and fill in with yellow using an artist brush.
Also using the artist brush with just a touch of water, I streak across the sun to bring the sky color over it. Let dry and put the mask over the sun again and add more ink with the brayer until you reach your desired depth of sky color. Jan: This 2nd brayer use helps cover any water streaks you donÂ’t like.
I used a number 10 artist brush to streak away from the sun so it gives a sun ray effect. This may not work for every cardstock; mine is a semi gloss (not a high shine) which I donÂ’t know the name of (I got it from a print shop years ago) but you can play with scrap to see if it works.
Now the reverse of the post it covers the sky. The other piece masked off a portion of the ground and I brayer on brown, cover that section and brayer on green, and cover that section and brayer on cranberry then sponged some brown over the cranberry to reach my desired color. I also did the water streaking for the ground area but very little so it may not show up in the photo. That does help blend the lines. For added interest you can tear the post it rather than scissor cut.
My inspiration piece for the ground area was an online art poster.
If you can use the water with your cardstock keep in mind that it also lightens the area so the amount you use if very important- less is best.
The last step: I stamped on the images and colored the palm tree with artist brush and re inker.
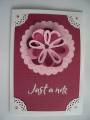
The tab is half of a punched circle.
Date: Tuesday, January 8, 2008 GMT Views: 5648
Favorited:27
Registered: July 17, 2005 Location: Staying inky in eastern Connecticut Posts: 79205
Tue, Jan 08, 2008 @ 9:20 PM
OMG....a jaw dropper, Rox.....always love a palm tree...but this is just gorgeous.......just like the sunsets you see in the tropics....fab, fab, fabulous
Registered: June 29, 2004 Location: Sugar Land. Texas Posts: 79798
Tue, Jan 08, 2008 @ 9:21 PM
Wow, these are gorgeous colors. I'm too pooped tonight to understand the directions, so I'll read them again in the AM!
Hope I get to play!!
------------------------------ LizThe joy of the LORD is my strength.Right Brain Madness --My blogProud member of the redDivasKSS certified multi-step stamperFan Club member since 2004
Registered: April 20, 2005 Location: The only Eaton Rapids on the Earth, Michigan Posts: 57568
Tue, Jan 08, 2008 @ 9:42 PM
What a stunning beauty, Rox!!! I can't stop looking at your beautiful sun and sky----Wow! You are always so good about explaining how you do things, too; I appreciate that!