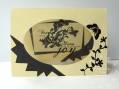
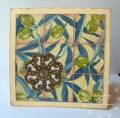
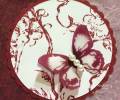
The tiles were inspired from a blog. I'll post the link as soon as I can find it. Since I don't really have patterned paper or stamps I used a napkin for the image and clear embossing powder (with some glitter inside on - when I bought it I thought it was white with glitter but now I'm happy it is clear) on top of the tiles.
Date: Monday, October 1, 2007 GMT Views: 345
Favorited:4
Additional Info
Paper: napkin, cardstock
Ink: wersamark type
Accessories: a jewel image from a magazine, clear sparkling embossing powder
Techniques: napkin decoupage, heat embossing (with my iron for the heat)
Registered: May 9, 2007 Location: Romania Posts: 302
Tue, Oct 02, 2007 @ 2:03 PM
Well, until I find the link, here are the instructions:
#1. Stamp a square image or use a napkin like I did or some designer paper.
#2. Draw a grid on the back so you have 9 sqares and number each square.
# 3. Cut along te grid lines, ink the edges of the little squares to make them look like tiles.
# 4. Use versamark and clear embossing powder to emboss each "tile"
# 5. Use the numbering on the back to replace the puzzle pieces living a very little space between them. I used PVA glue to stick them on cardstock.
# 6. Embellish the image or live it as it is and mount on the card base.