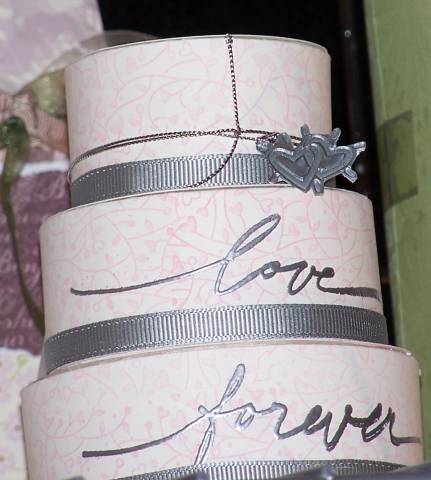
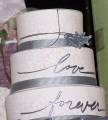
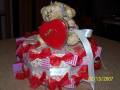
This tiered cake. This is made out of paper and coasters cut in circles for the bottom of each tier. and each tier is a compartment to keep treats for guests at the reception. then with mini mates used the two hearts and embossed on silver paper about 3-4 times to make a charm.
here is the info on this- it looks harder/longer than it really is:
Here is some information on the tiered cakes. To get the first one done it was a bit of work to get the measurments right, but after you get the hang of it, it doesn't take much time.
the bottom tier is approx 3 inches in diameter.
the middle tier is approx 2.25 inches in diameter
the top tier is approx. 1.50 in diameter
for each tier you will want to cut two coaster circles at the diameter above one should be a little (very, very little) bit smaller than the other. The smaller one will be for the bottom of the tier - this is so the top of the box will fix over the bottom part of the box for each tier.
then cut 6 stripes of paper (after you stamp your designs), at 4 1/4 inches and long enough to go around the coaster plus one 1 inch. Score lengthwise at 1 inch and 2 inch.
Fold at the score markes and at one end cut an angle at the end to narrow the edge so you can put it into the other end - we will get back to this later.
The 1/4 is folded up on the inside of the tier -to make the outside look more tidy.
Glue the inside of the strip, leaving 1" that is not glued on the non narrowed end side of the paper strip (this will be used to put the narrowed end in later) and glue the 1/4 fold to the inside of the strip.
Put sticky strip on the the bottom inside of the folded strip (this will go where the 1/4 fold is). Peal off the sticky strip plastic and start wrapping the paper strip around the coaster. Finish by adding glue the the narrowed end and put it inside the other end, for a nice clean seam.
Keep doing this for all the tiers. I used sticky strip to glue the tiers together.
Then I used white grosgrain and dyed it with the encore pad and glued it around the edges.
To make the charm: on a piece of paper (I used silver) add silver embossing powder and melt it down, this should be a little bigger than your stamp is. Let it cool and do this 3 more times. After the embossing has cooled the third time, sprinkle emb. powder and melt down again BUT this time, right when you are done, stick your stamp into the melting emb. powder and then pick it back up. Let the image cool and then cut around it. I punched mine and used cord.
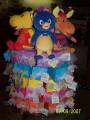
**you cannot see the top tier, but for an extra added touch you can make the top tier a shaker box that you can see what is in the top tier. I put the neutral beads in the shaker box. This adds quite a bit of work as you need to cut 3 coasters and then cut the inner circle to show the shaker box. (trying to find a picture of this and will post if I find!)
Please let me know if these do not work- as I just made these cakes up in my head and there isn't really any pattern except what is in my head! So, trying to explain that sometimes - it sounds good to me, but not to others
Date: Saturday, August 11, 2007 GMT Views: 1209
Favorited:9
Registered: February 4, 2005 Location: Suwanee, GA Posts: 336
Sun, Aug 12, 2007 @ 6:44 AM
Please give me more directions!!! I am going to do a big event for World Card Day and want to have different types of displays on showing how to make party favors. This would be fabulous!!! Thanks much!!!