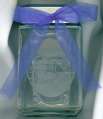
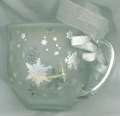
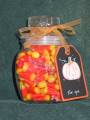
More glass etching. To check out how I did this look at my gallery. Directions are listed on the Etched snowflake mug and cookie jar.
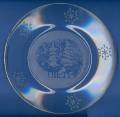
This is a plate that I did last week for my Christmas Gifts class. I wanted to show two ways to glass etched . . . both positive and negative etching. I combined the embossing method (for the deer) with the template method (using the snowflake punch punched into a plain label sticker). The results were awesome and everyone had fun.
Also, in this sample I've used a gold foiling pen to add a gold edge. The bad thing about doing this is that the edges on cheap plates may have little defects (uneven edges) and they will become evident when highlighted with the gold edging.
Date: Monday, December 13, 2004 GMT Views: 6205
Favorited:66
Registered: January 14, 2004 Location: Virginia Posts: 508
Mon, Dec 13, 2004 @ 8:51 AM
Colleen, I tried doing the versamark/etching cream technique and when I ran it under hot water and used my fingernail, the etching cream came off. Any idea what I may have done wrong? I used Delta brand White Frost etching paint.
Thanks, Merrie
------------------------------ A truly happy person is one who can enjoy the scenery on a detour.
Merrie,
I am not familiar with the product you used. I think the etching paint is different than the etching CREAM I use. I use Armour Etch etching cream and follow the directions exactly as I've posted and it works every time. Even using the products I've recommended, your etching cream WILL "come off" in the water and so will the embossed area. That is what you want. The item appears etched when dry (where you applied the etching cream) and the embossed area (masked area) remains smooth because the original glass shows through. Give it another whirl but this time use what I do. . . let me know if you have any problems then.
I've also added a scan of the bottle of Armour Etch to my gallery so you can see what I use.
Registered: November 4, 2004 Location: SW Ohio Posts: 23
Mon, Dec 13, 2004 @ 2:10 PM
Coleen,
I loved your cookie jars so just had to do those for Christmas gifts. I had a problem getting the whole stamp on the side of the jars. Tried rolling it but the jars really weren't that curved. I got the RIGHT kind of cream off e bay so I know that isn't a problem. I finally ended up just using smaller stamps that are less detailed. They look ok but I really liked the bridges and had that set. Thanks for the great instructions though. Ruthann