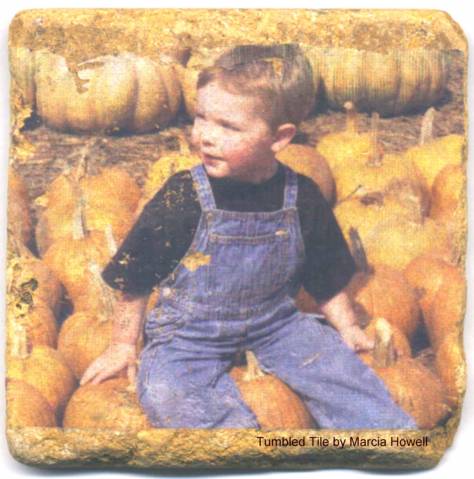
This is my youngest son, when he was 2 1/2 years old, at the Pumpkin Patch at a local farm.
Transfer method:
Great White Imaging & Photo Paper (www.gotoforms.com)
Golden's Gel Medium Matte Finish (art section of Michael's)
Perfect Paper Adhesive (glue section of Michael's)
tool to burnish with
Print picture on paper listed above. Using your finger (or a brush) smear the gel medium over the photo, going past the edges of the photo. Place the tile face-down on the photo. Flip them both over and burnish the photo onto the tile. I use my hand, but you can also use a hard rubber brayer. Pull the paper up quickly. If there are any fuzzies left from the paper, carefully remove them without disturbing the image. Let dry. Seal with Perfect Paper Adhesive.
This doesn't take long at all! Mine was first dry in just a few minutes, and the Perfect Paper Adhesive dried in an hour.
** This method reverses the image from the picture! So, if you have a picture with words or letters, manipulate it first in your photo editing program so that it prints in reverse. Then it will be correct on the tile. I don't have that ability in my program, so this actually is opposite of my original photo. **
Try this on dominoes!
Date: Tuesday, November 23, 2004 GMT Views: 2106
Favorited:56