Be anxious for nothing, but in everything by prayer and supplication, with thanksgiving, let your requests be made known to God; and the peace of God, which surpasses all understanding, will guard your hearts and minds through Christ Jesus. Philippians 4:6-7
Registered: March 22, 2006 Location: Pendleton,OR Posts: 141
Thu, Feb 01, 2007 @ 8:44 AM
Veru cute. I would also love to have the directions for doing these. I have a friend who is due next month with her second child and this would be such a cute gift..
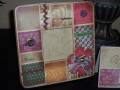
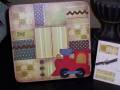
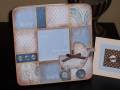
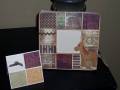
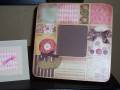
TFL. Here are the directions for these frames. They are so much fun to make; and best of all, you get to use all those scraps of paper!
Frames are $1 wooden frames from Michael's. Other craft stores carry them at a higher price.
1. paint the frame an antique white color
2. Create your design by choosing many coordinating papers--cut the papers into squares/rectangles, cutting them just a tad smaller that the width of the frame. On the corner pieces, i use my stampin up corner rounder to match the rounded corners of the frame.
3. Using a foam brush and decopauge medium, brush the decopauge medium on the frame and adhere one square of paper at a time, squeezing out the excess medium. I also use my fingers to wipe off the excess medium that is between the squares. Let dry until dry to the touch.
4. Using sponge and basic brown ink, antique the outside and inside edges of your frame.
5. Using a foam brush and Delta Matte brush on varnish, add one thin coat of varnish. Let dry to the touch.
6. embellish...buttons, ribbon, brads, wood cut-outs with paper decopauged on them, etc. I use a glue called e6000...very strong.