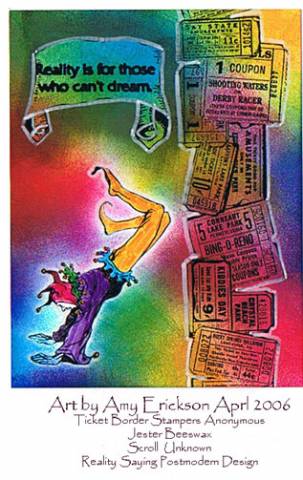
The inks used are the Staz-On on Matte Kote Paper from the Paper Cut.
The other few additions I should mention are Faber Castell Pit Pen (they are Inia Ink Markers - very intense colors.) GREAT markers!!! I also highlighted some areas wih a white Galaxy Marker. It made a huge difference in the finished product.
Date: Thursday, August 31, 2006 GMT Views: 255
Favorited:2
Registered: June 26, 2006 Location: Minnesota Posts: 15
Sun, Sep 03, 2006 @ 6:26 AM
I can try to type the technique out, but I am afraid it may be a visual thing. Make sure you have matte Kote paper and cosmetic sponges. I start by stamping my images in black staz on. Next, lay a piece of scratch paper over your cardstock and blot excess black ink off. Let dry overnight (I also heat set, too) These are solvent based inks so if they aren't dry applying more ink on top will lift your black. If you don't want something colored, mask it off (as I did with the jester in this piece). Sponge colored staz on using a cosmetic wedge. Check your sponges frequently JIC the black is lifting (it may smear on your work) if you see black on your sponge, get a new one (this tends to happen most often with yellow not sure why). Continue to apply inks until you like the color intensity. Once you remove your masks you can color in any images or areas with the Faber Castell Pit pens (again, I did this to the jester). Use the Galaxy white pen to highlight selected areas. This is a very important step - you will be amazed at how much your colors pop after doing this! I also sometimes cut out a rectangular mask to cover syaings and such and use the grey staz on lightly to accent my words (I did this around the scroll). HTH!!!