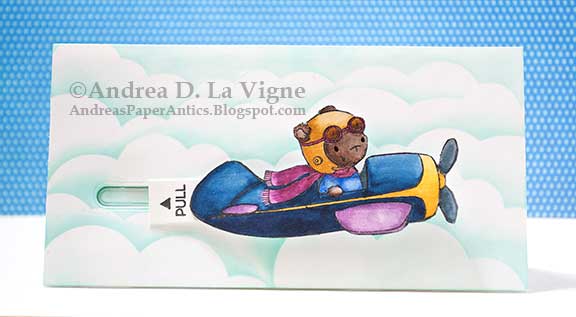
I got the inspiration for this card from a YouTube video by Carrie Rhoades for a "Pull & Pop" card. The Teapot challenge I created it for suggested interactive cards for the recipient, so I figured this would be perfect!
I stamped the image onto a scrap of smooth bristol paper. I used my Zig markers to color it, blending out the colors with a damp paintbrush. I went over the bear's eyes with a black glaze pen, for added shine. I fussy cut the image out (there is no coordinating die), & "painted" around the edges with a black brush tip marker to hide the white core of the paper. I temporarily adhered it to a scrap of white cardstock, & fussy cut around the image again. I removed the cut-out image from the second layer of cardstock, & painted around the edges of that layer with the same black marker. I made sure on that piece to angle the marker from the front side, so if the tip slipped, it would mark on the front. Finally, I ran the image cut-out through my Xyron Creative Station 250 to add adhesive to the back. I adhered that to the backer piece, both for added strength & to hide any black marks from painting the edges of the paper on both pieces. (The black marks ended up being on the sides that are adhered together.)
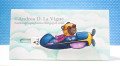
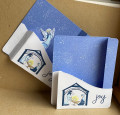
I cut a piece of white cardstock to fit my mini slimline card base. I stenciled the clouds with Salvaged Patina Distress ink. I die cut the slider channel from that panel, & saved the cut-out piece for later.
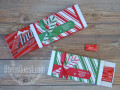
For the slider on the plane, I punched two 5/8" diameter circles from heavyweight white cardstock. I added a doubled layer of tiny strips of foam tape to one, & then adhered the second on top of the tape, lined up with the first circle. I cut off a short piece from the right end of the strip from the slider channel, & added 2 layers of foam tape to the back of that. I cut another 2 layers of the tiniest pieces of foam tape, & adhered them to that same strip, at the curved end, leaving a small gap between those & the other foam tape layers on that piece. I die cut another piece of the slider from a scrap of white cardstock. I looped a rubber band into the gap between the 2 double layers of foam tape on the slider channel piece, & adhered the white slider piece on the bottom to sandwich the rubber band into place. (I hope that all makes sense!)
I glued the punched circle foam tape "sandwich" to the back side of the plane, towards the tail end. I adhered my cloud panel to the card base with 1 layer of foam tape, making sure not to get the tape too close to the slider channel, where it would interfere with the plane. I glued the strip (left from when I'd die cut the channel from the cloud panel) to the card base, within the opening on the front panel. That way, there is a more seamless look to the sky panel. I glued the slider strip/foam tape "sandwich" to the right end of that channel with liquid glue, with the underside flat on the card base. I looped the rubber band around the foam tape in the punched-circle "sandwich," and then slipped the bottom circle into the channel. (The foam tape in both sandwiches goes between the long edges of the channel.)
I cut a strip of white cardstock, folded it in half, & glued it together to make a double thickness. That gave it extra strength. I stamped the pull & an arrow on the strip, then glued the end of the strip to the back side of the airplane's tail. When you pull the tab, the airplane moves backwards. Then, when you let go, the rubber band makes it fly across the card. I just think that is so neat! Even having watched the video, it took some finagling to get everything to work, especially with the TINY pieces of foam tape I had to cut for the slider parts. But I'm so glad to have gotten it done, & hopefully the recipient will love it as well!
Date: Saturday, January 21, 2023 GMT Views: 302
Favorited:2
Stamps: Stacy Yacula for Purple Onion Designs "T-Bird (Bear in Airplane)"; My Favorite Things "Interactive Labels"
Paper: Strathmore smooth bristol paper; white
Paper Size: Mini slimline
Ink: Salvaged Patina Distress ink; Versafine Onyx Black
Accessories: Zig Clean Color Real Brush markers; black glaze pen; Essentials by Ellen (Ellen Hutson) "Swing n Slide" die; My Favorite Things "Cloud" stencil; 5/8" circle punch
Registered: August 15, 2007 Location: Twin Cities MN Posts: 50701
Sat, Jan 21, 2023 @ 1:46 PM
This is darling Andrea! Your coloring of the little guy in his plane is wonderful and I'm sure John will enjoy the slider aspect of this card. Well done!
Registered: February 19, 2011 Location: Fullerton, CA Posts: 15293
Sun, Jan 22, 2023 @ 7:58 PM
This is so fun and I bet John will think so too. Love how you colored both your pilot/plane and that beautiful cloudy sky. I struggle with slider cards, so I am very impressed that you made this one. Thanks for all the details too. Great card.