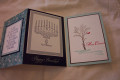
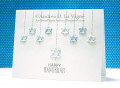
I got the idea for this card from this one I had saved in Pinterest. We have a friend who is blind, so I thought, with a few adaptations, this would make a nice Hanukkah card for her.
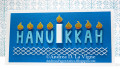
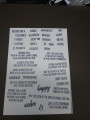
I adhered teal fun foam to the back of teal cardstock with Stick It adhesive. I die cut the letters from that, and set them aside. I cut a candle for the center from teal cardstock, and backed that with the same fun foam, using double-sided tape to attach it. I used a tool that's really meant for forming paper flowers to do the Braille for the "happy" on a scrap of white cardstock. I cut that down to fit my center candle, leaving a 1/16" margin on the left & right sides, and adhered it with double-sided tape.
I drew 3/4x1/2" boxes on the back of a scrap of gold glitter paper. I used those as guides to draw my candle flames. I fussy cut the flames, and added shading to the bottom of each with a dark orange Sharpie marker.
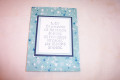
I decided my card needed something else along the bottom, since my greeting wouldn't fill it enough. But, since the recipient is blind, I wanted it to be tactile. So I used my old Sew Easy tool & one of the piercing heads to create a stitching pattern. I purposely left my cardstock longer than the final 8", until I saw where the holes ended up. Using this tool is definitely more art than science, since you can't place the holes precisely. I also had to poke through the holes with my paper piercer, just to make it easier to get my needle through. Once I had the holes set, I trimmed a little of each end of the panel. Finally, I stitched the pattern with blue pearl cotton, securing the ends on the back with just little strips of Scotch tape.
After finding the center of my panel, I adhered my candle there, and stuck the flame down with a little piece of foam tape. I peeled the backing from the Stick It off my letters, & added them to either side of the center candle. I used my T-square ruler to make sure everything stayed straight. After the spacing looked right, I burnished the letters down with my Teflon bone folder, & added the rest of the flames with foam tape. Finally, I adhered my panel to a white card base.
Date: Thursday, November 19, 2020 GMT Views: 1481
Favorited:4