Watercooler Wednesday Challenge 201 - "WWC201 - Marsha's Special Two-Week Year End Anything Goes".
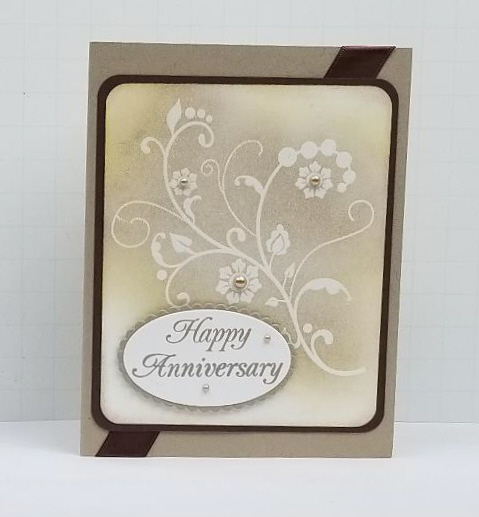
It's a new year coming, and that means more anniversaries to celebrate! I wanted a card that was both flowery and masculine at the same time, so I chose browns for my colors and the lovely Stampin' Up! (SU) "Flowering Flourishes" stamp set. I started with piece of SU Whisper White cardstock that I stamped the flourish onto with clear Versamark ink. I then dusted the stamped image with clear embossing powder, and heat set it until it was glossy. This meant I retained the color of the cardstock, and could sponge ink over it without worrying about where the ink went (since I could wipe the ink off the embossed image after I was done). I sponged with SU Crumb Cake and So Saffron ink. Then after wiping the ink off the image, I added taupe pearls to the center of the three flowers. I used a corner rounder punch on the four corners of the sponged panel to soften the look.
Next I stamped the sentiment onto a scrap of SU Whisper White using SU Crumb Cake ink. Since I wanted the words to be pretty dark, I used my MISTI to stamp the sentiment three times. I used an oval die that was just large enough to fit the sentiment to die-cut it out. Then used the next size up scalloped die to die-cut out a mat for the oval. I glued the two together with Tombow, then mounted it on the sponged panel with adhesive foam strips.
I wanted a sharp contrast mat, so used SU Chocolate Chip cardstock that was just 1/4" wider and taller than the sponged panel. I rounded it's corners before gluing it to the sponged panel.
Finally, I used a strip of SU Chocolate Chip satin ribbon and adhered it from corner-to-corner to the SU Crumb Cake card base using SU Snail Adhesive. Then glued the matted sponged panel centered onto the card base front.
I think this card is just the right combination of feminine and masculine for an anniversary card! I am rating its difficulty level as "1" out of a possible "5". Sponging is so easy to do, and adding it to a heat embossed image makes it look so elegant!
Date: Wednesday, November 28, 2018 GMT Views: 1073
Favorited:4