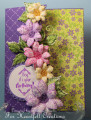
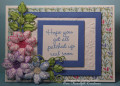
Cut out two tags using white cardstock and the coordinating die. Glue the pieces together and this makes a heavier tag. Cover with a piece of the paper collection cut with the coordinating die. Using blue cardstock, cut out the base for the medallion and the two corner pieces using the coordinating dies. Glue the two corner pieces to the bottom of the tag. Add the buttons to the corner pieces by gluing them down. Find a medallion on the paper collection and use the coordinating die to cut out. Glue it to the medallion base. Using dimensional tape adhere the medallion to the tag front.
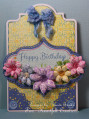
Stamp the flower petals using various inks onto white cardstock. Use the coordinating dies to cut out the petals. Spritz the back with a bit of water and use the Deluxe Flower Shaping Kit to shape; set aside to dry. Add coordinating color Prills to the center of the flowers and allow to dry. Decide on the placement of the flowers and glue them down.
Using blue ink, spread some onto a craft mat and spritz with water. Spray some seam binding with water then drag it through the ink and scrunch to allow to dry. Once dry tie a bow and use Scor-Tape and Designer Dries Clear Adhesive to adhere to top of tag.
Date: Wednesday, October 24, 2018 GMT Views: 179
Favorited:2