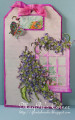
Instructions: To view a larger photo of this project, click here. I made my own tags out of heavy white cardstock. The bottom tag measures 4 1/2 x 7 3/4". The smaller tag measures 4 1/4 x 7 1/2". Edge the larger tag with ink and a sponge dauber then cover the smaller tag with a piece of the paper collection. Edge the tag with ink and use dimensional tape to adhere to the larger tag.
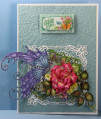
Using Eldeberry Memento ink, stamp the flowers and I used black to stamp the leaves and the little butterflies. Cut out the flower petals using the coordinating die and then color using ink and sponge daubers. Run the flowers through the 3D Flower Mold and then I used the Deluxe Flower Shaping Kit to shape just a bit more. Set aside to dry. While the flowers are drying I colored the butterfly with various inks and then I cut it away from the other butterflies. Cover it with Crystal Lacquer and put it on a piece of wax paper to dry.
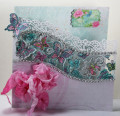
Going back to the flowers, add some glue to the centers and pour prills over and allow to dry. Next, I put some adhesive on my craft mat and, using a sponge, I applied adhesive to the edges of the Lilacs and then I dipped them into the Crystal clear. Set them aside to dry.
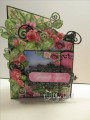
Stamp and cut out the window and glue a piece of the paper collection behind so that the little bird cage is showing through. Back with a piece of cardstock and apply to the tag using some of the dimensional tape. Color the Lilac branch and adhere it to the side of the window. Also glue the little swags over the top of the window and glue down some of the lilac flowers. Next apply the flowers to the Lilac branch and let them dry.
I took another piece of white cardstock and colored the edges with some ink and then I found a ticket on the paper collection. I cut it out using the coordinating dies and applied it to the colored cardstock to make a sign. I used more dimensional tape here as well. Now glue down the little butterfly. Take a piece of the seam binding and apply some ink that has been spritzed with water and then scrunch the seam binding and allow it to dry. Tie a bow in the top of the tag and it is ready to go.
When you are making a tag you need to decide what you want it to say and then get on down to business. I love making tags because they can become little works of art and are wonderful to send along with a gift. They can also become the gift on it's own, so I always try to go the extra mile on my tags. Enjoy!
Date: Wednesday, May 2, 2018 GMT Views: 306
Favorited:2