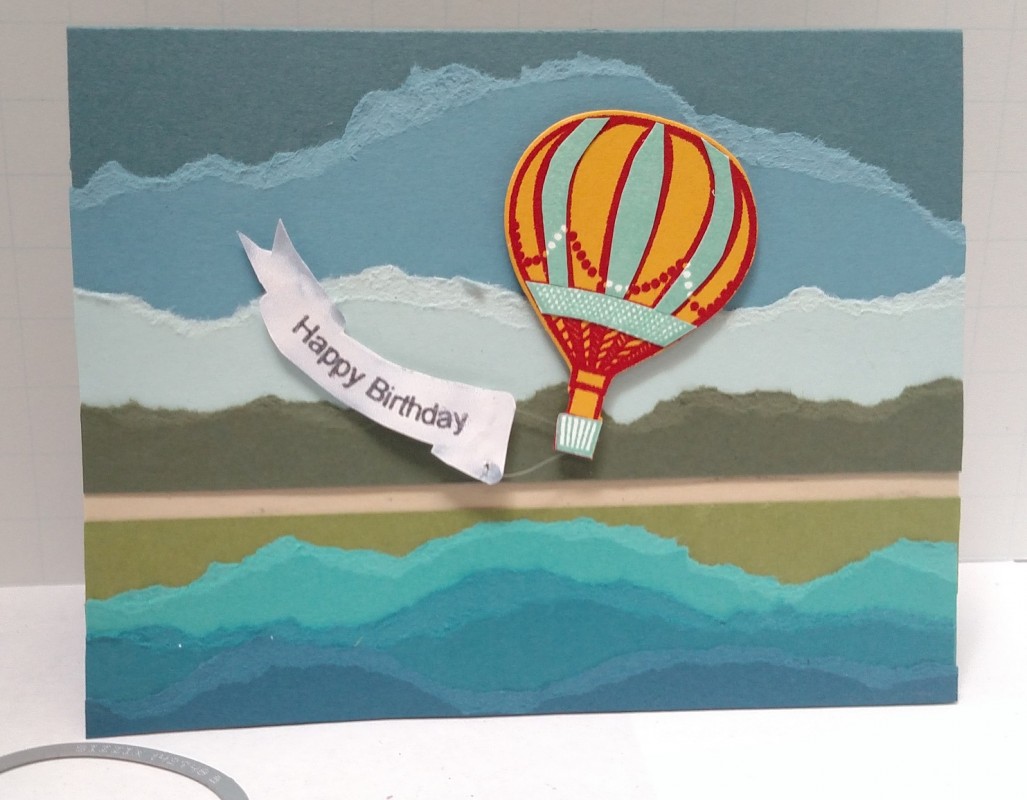
Made for Just Add Ink Challenge #369 which required that we be inspired by the colors or setting of a photograph.
Because I wanted to create several hues of sky and water, I decided to use paper tearing instead of ink sponging. I started with my Stampin' Up! Blue Bayou cardstock (retired) as my 5-1/2"x 8-1/2" (folded in half) card base and started building the card from the top down. Each of the colors was a 5-1/2" strip of cardstock that was torn by hand with the side on my right torn toward me. Below is the recipe for the tears in order of gluing starting from the top down:
Sky:
Marina Mist
Soft Sky
Trees:
Mossy Meadow
Beach:
Very Vanilla
Tree Reflection in Water:
Old Olive
Water:
Bermuda Bay
Island Indigo
Dapper Denim
After all the torn strips were glued down, I used a Paper Snips to trim the sides and the bottom of the card so that matched the Blue Bayou card base.
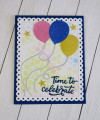
The balloon took some tricky steps to create the yellow, red and blue stripes I needed. I first stamped the middle size balloon from the SU Lift Me Up set using Real Red ink on Crushed Curry paper (thus achieving my red and yellow stripes. Then I stamped a second balloon - this time SU Pool Party ink on Whisper White cardstock. I used my MISTI both on the yellow and white cardstock to ensure I got solid color since there is quite a lot of solid areas on this stamp. I didn't want "holes" or faded areas. I ended up stamping each image three times to achieve the rich color I needed.
I then used the SU "Lift Me Up" thinlits dies to cut out both the red/yellow and blue/white balloons. Using the red/yellow image as my balloon base, I cut inside the lines on the vertical blue stripes so that when glued on top of the red stripes, a bit of red would peak out on either side of the blue stripe. I did this for all three red stripes. I also cut the basket and the horizontal stripe out of the blue balloon because I felt there was just too much red in my balloon otherwise. All these pieces were glued to the red/yellow balloon using Tombow liquid glue.
Finally, I had to come up with the banner that I wanted flying off my ballon. I used "My Memories Studio" software and selected a banner image that I fitted the words "Happy Birthday" to using the MDS "Attach to Shape" tool. I printed this out on printer paper and hand cut it out. I then used fishing line and attached it to the back of the banner and balloon basket using Mini Glue Dots.
This final balloon and banner element was attached to the card using Adhesive Foam Strips to give the card added depth.
The card wasn't hard once I knew how I wanted to go about it. Paper tearing is super easy. Creating the three-color balloon was just a matter of patience in cutting the cardstock and gluing it down where I wanted it. But I will give it a difficulty of "4" because combined together the elements of the card took me an hour to do.
Date: Friday, July 21, 2017 GMT Views: 1146
Favorited:2
Paper: SU Blue Bayou, Marina Mist, Soft Sky, Mossy Meadow, Very Vanilla, Old Olive, Bermuda Bay, Island Indigo, Dapper Denim, Whisper White, Crushed Curry
Paper Size: A2
Ink: SU Real Red, Pool Party
Accessories: SU UP & Away Thinlits Dies, Paper Snips, Mini Glue Dots, Adhesive Foam Strips, fishing line, Tombow Multi Liquid Glue
Registered: September 24, 2011 Location: Posts: 88
Sun, Jul 23, 2017 @ 3:35 PM
Such a fabulous recreation of the photo scene Donna! I love your torn paper landscape and how you paper pieced your lovely balloon too. Thanks for sharing with us at Just Add Ink this week, Janx
Registered: February 9, 2008 Location: Canberra, Australia Posts: 29
Wed, Jul 26, 2017 @ 3:57 PM
Fantastic technique, Donna. The torn papers look great, and I love your bright balloon. Thanks for joining the challenge fun at Just Add Ink this week. Patrice x
Registered: January 20, 2016 Location: Freetown, Massachusetts Posts: 31438
Sun, Apr 29, 2018 @ 3:31 AM
Oh, I love this! I never think to use torn paper this way, but your landscape came out amazing! All those layers add so much depth. Congrats on being Featured Stamper today! Looking forward to browsing the rest of your gallery...