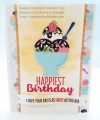
This is the stepped-up version of my clean-and-simple card. I made quite a few changes. First, instead of leaving the right half of my cardfront white, I stamped the balloon, hat, and gift all over it, to create my own contrasting DSP-type background. I didn't stamp the cake, because the cake stamp is huge compared to the cake in the DSP on the left.
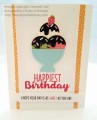
The extra surprise on this card is that it is not a full cardfront. The Real Red DSP on the left is actually glued to the inside of the card. I used my Stampin' Trimmer to take off 2" of the cardfront, on the left side (do this before you score the card). I stamped the right side, then glued the strip of striped paper on top of the right side (the front), then opened the card and glued an identical strip to the inside. So the inside is a whole card, but the front is just the right side, if that makes sense.
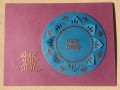
I again stamped my sentiment in Real Red and cut it out with the Stitched Shapes oval framelit. I also cut out a Stitched Shapes square framelit. I stitched around through the stitching holes using three strands of Real Red Baker's Twine and a regular small sewing needle. I popped the oval up on dimensionals over the square, then glued the right side of the square to the cardfront.
Lastly, I stamped/cut the additional balloons, gift, and hat and stamped and handcut the "friend".
Thanks for looking!
For more details and to see more pictures that will show you the partial cardfront, see my blog post.
Registered: April 21, 2004 Location: Clark Fork, ID Posts: 12797
Thu, Apr 27, 2017 @ 10:01 PM
Great card. If you had not mentioned how you do the front of the card, one would not know that it isn't an entire card front. Very creative. Love the stitching on the square. TFS
------------------------------ Susie
Stampin' Up! demonstrator
Growing through challenges