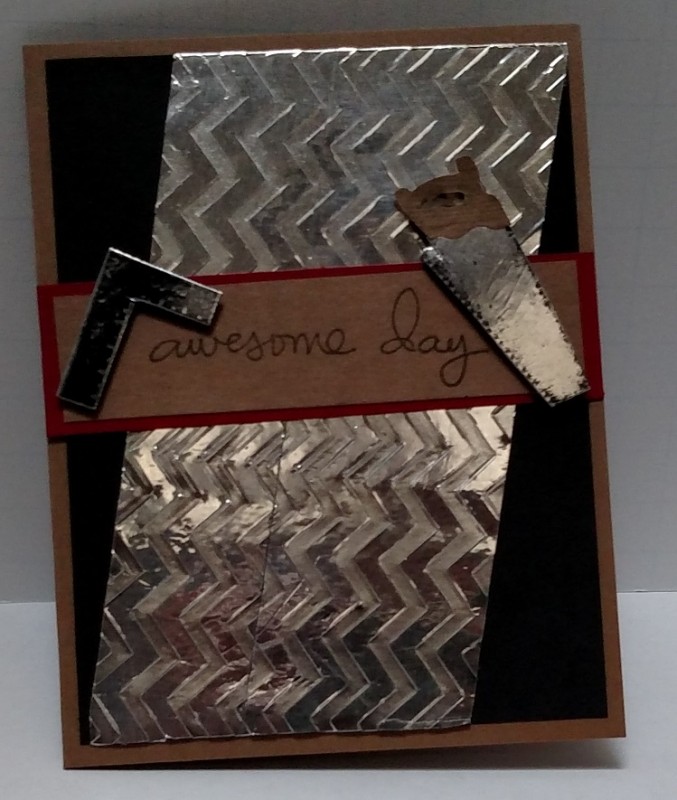
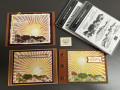
Made as a Design Team card for Try Stampin' -Or Not- on Tuesday Sketch Challenge #312: http://trystampinontuesday.blogspot.com/ with an optional theme of "angles".
I started out with my design with the idea that I wanted to use an embossing folder that had "angles". I thought the Life Style Zig-Zag folder was just what I needed. I love embossing metal tape, so I pulled out my Nashua brand I had bought for a furnace duct repair from Lowes. On a scrap of black cardstock I adhered three strips of tape an angle so the joint would be parallel with the zig-zag pattern. Then I ran the foiled cardstock through my Big Shot using the folder with the zig-zags paralleling the long side of the cardstock (more on how I figured out the dimensions of the angle listed at the end of this post). Because the foiled covered piece was slightly longer than the embossing folder, I ran the foil through only half-way, then turned the foiled piece around and matched up the zig-zags exactly and ran the embossing folder through the Big Shot only half way again. This prevents creating edges where the design in the folder ends. Just remember to NOT run the folder all the way through off the open end.
Because the foiled cardstock tends to curl, I attached it to the Basic Black panel using SU Tear & Tape super adhesive tape. The super sticky red tape you find in craft stores would also work.
The tools were stamped using Stazon Jet Black ink onto scraps of the foiled cardstock, then hand cut using paper snips. I restamped the saw using Crumb Cake ink onto Kraft cardstock, then cut the "wooden" saw handle out by hand. I wanted wood grain on the handle, so inked up Crumb Cake onto a portion of my SU Hardwood stamp and pressed the cut-out handle onto the stamp. This was glued down on top of the cutout foiled saw.
The sentiment is from SU's Endless Birthday Wishes. I stamped it with Early Espresso centered on the Kraft cardstock panel, which I then matted with Cherry Cobbler cardstock. Because this matted piece needed to attach to the foil zig-zag piece, I used Tear & Tape again to attach it.
The tools were attached to the sentiment panel using small pieces of Adhesive Foam Tape to raise them off the plane of the card for depth and visual interest.
Below are the measurements for the cardstock I used:
Card Base (Kraft): 5.5"x4.25"
Black Front Panel: 5.25"x4"
Zig-Zag Panel: Parallelogram 3"x5.25"
Sentiment Panel (Kraft): 4"x1"
Cherry Cobbler Mat: 4.25"x1.25"
HOW TO CUT THE FOIL-COVERED PIECE: Cut out a standard 4"x5.25" panel of scrap paper. Measure 1" in from the top right and the bottom left. Draw a line from these marks to the opposite corner along the long side of the panel. Cut this out and use as a cutting template on your foil-covered panel BEFORE embossing. I temporarily attached the template to the foiled piece using two Mini Glue Dots.
Date: Thursday, February 9, 2017 GMT Views: 644
Favorited:2