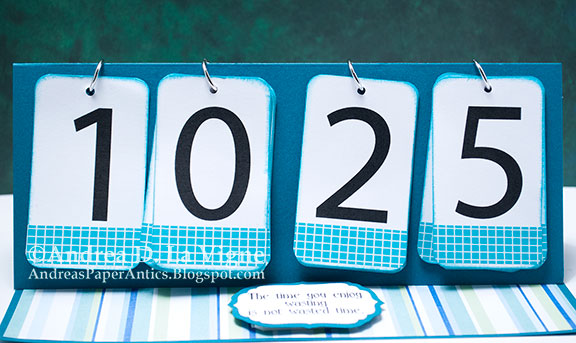
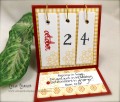
I didn't have any large number stamps, so I created the numbers on the computer. I created a blank "canvas" in Photoshop, to the dimensions in the tutorial, and typed my numbers on that. With each new number, I dragged that (along with a layer that had an outline the size of the canvas) to a new page, so I could print them all out at once. I was able to get all the numbers on two 8.5x11" pieces of paper! After I printed them, I cut them out with my trimmer, and added washi tape along the bottom of each. I rounded the corners with my 1/4" Corner Chomper, and inked the edges with Peacock Feathers. For the "stopper," I die cut a label with one of the Spellbinders dies from white cardstock, and scanned it into my computer. I used that image in Photoshop to help me size & format my saying, which says, "The time you enjoy wasting is not wasted time." (Words to live by!) Then I just printed that onto my label. I used the same die to trace around its outer edge onto a piece of teal cardstock (the same I'd used for the easel base), and fussy cut that out to mat my label. I glued those pieces together, and adhered them to the base of my calendar with 2 layers of foam tape. I think, though, that I may have to put another stopper behind where the easel stands up, since it tends to flop backwards! I'll have to wait & see.... I plan to give this to my counselor's receptionist for her desk. (She loves the color blue!)
Date: Tuesday, October 25, 2016 GMT Views: 474
Favorited:2
Registered: January 26, 2010 Location: Wisconsin Posts: 78718
Sat, Oct 29, 2016 @ 7:16 PM
Andrea,
bright and bold and beautiful colors on your calendar! Your numbers turned out so wonderful!
Thank you very much for playing along with this tutorial!