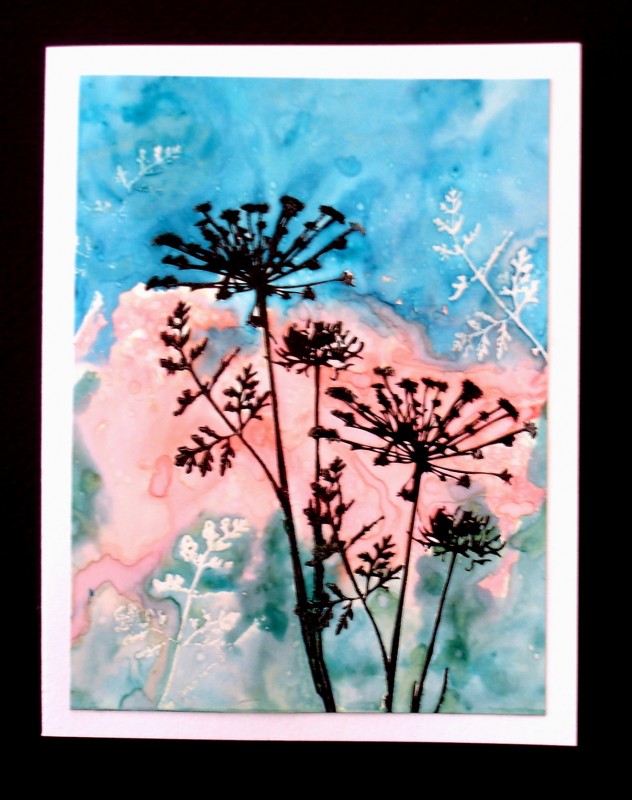
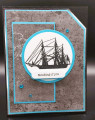
I stamped my image several times on Glossy cardstock and embossed with clear powder. Put 1 drop of each re-inker on my pallette & added just a dab of Twinkling H2O's of the co-ordinating color. You need a generous amount of water to make the colors "float" - HINT: To keep the paper from buckling 1st lightly wet the BACKside of the paper - lay it in a tray then spritz the front side of the paper. Make sure you can see some puddles. Dip your brush into the color then touch it to one of the puddles - it will spread randomly around the paper. Remist if needed as you add colors. Once done if you have any BIG globs of water it can be wicked up with the corner of a tissue then carefully lift your piece out out of the tray to dry.
Date: Tuesday, October 25, 2016 GMT Views: 1531
Favorited:5
Registered: July 25, 2004 Location: Hog Wallow, KY Posts: 38242
Tue, Oct 25, 2016 @ 5:05 PM
Wow, I like how you created the background with the colors. I also like how you used white and black firmthe silhouettes. Very pretty. Thanks for sharing your tips and tricks.
Splitcoast Dirty Dozen Splitcoast Challenge Hostess Proud Fan Club Member
Registered: September 24, 2007 Location: WA Posts: 13911
Tue, Oct 25, 2016 @ 5:35 PM
Thank you so much for sharing the steps you took to create this lovely card. The background colors are just perfect for this week's challenge, and the Queen Anne's Lace silhouette is so pretty!
------------------------------ Barbara Splitcoast Dirty Dozen My website: Inky Fun SCS Fan Club Member Color Challenge Team Member QFTD215