Heartfelt Creations Products and Products Carried in Their Store:
HCDP1-269 Snow Kissed Paper Collection
HCD1-7108 Snow Kissed Flakes and Tags Dies
HCPC-3749 Snow Kissed Spruce Cling Stamps
HDC1-7107 Frolicking Frosty and Spruce Die
HCPC-3751 Snow Kissed Flakes and Tags Cling Stamps
HCD1-7109 Mini Snowflakes Dies
HCPC 3750 Frolicking Frosty Cling Stamps
Designer Dries Clear Glue
Tuxedo Black Memento Ink
Crystal Art Glitter
Other Products Used: White and Blue Cardstock, Forest Moss Distress Ink, Spellbinders Standard Circles Large, Zig Clean Color Watercolor Real Brush Markers in 026 Light Pink, 094 Gray Brown, 023 Scarlet Red, 036 Light Blue and 047 May Green, Windsor Newton Iridescent Medium, Water Brush, Watercolor Paper, Bling on a String, Dimensional Tape, White Embossing Powder, hot glue
Instructions:
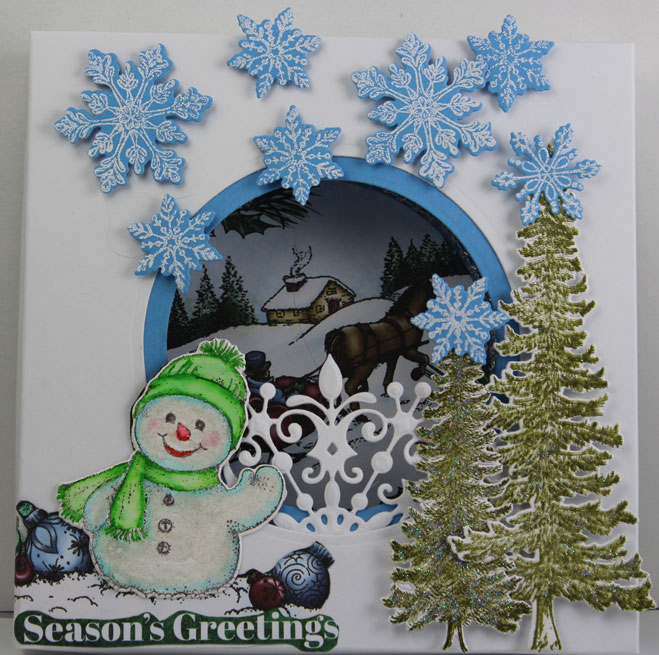
This box is 6 X 6. Cut one piece of cardstock 8 X 8 and one piece of cardstock at 8 1/16 X 8 1/16. Score both pieces at 1" around all four sides. Glue the bottom piece together and set aside. Now working on the top piece, cut a circle in the middle of the card, then cut out a snowflake and cut off until there is only a short piece left. Glue it so that it makes a grid for the circle cut out. Next take a piece of blue cardstock and cut a circle in it. Place it behind the cut out on the top part of the box and glue the piece of the snowflake between the blue and the white so the cut part is hidden. Cut another piece of blue cardstock to fit the inside bottom part of the box and glue it down. Next I found an image of the sleigh on one of the card fronts and cut it out using the circle die again. Glue this so it is showing behind the circle on the box top. I used hot glue to apply some bling around the circle just to give it a festive look.
I fussy cut the little snowman and ornaments on another card front and glued it to the top of the box. Next stamp the little snowman onto watercolor paper and color using the Zig markers and the iridescent Medium. Once it dried, I glued it to the corner piece and fussy cut a sentiment out of the paper. Stamp, emboss and cut out the trees: add glitter to the front of the trees and then use dimensional tape to adhere to the top of the box. When I embossed the snowflakes, I added some glitter to the embossing powder and then embossed and cut out. I decided where I wanted the snowflakes to go and then used dimensional tape to adhere them.
Date: Wednesday, August 24, 2016 GMT Views: 174
Favorited:2
Registered: January 20, 2010 Location: Brampton, Ontario Posts: 26123
Wed, Aug 24, 2016 @ 4:36 AM
Love this! Your beautifully embellished card front really draws the eye into the winter scene within! Thanks so much for taking the time to add the design information! Such a cheery snowman; he makes me smile! :-)