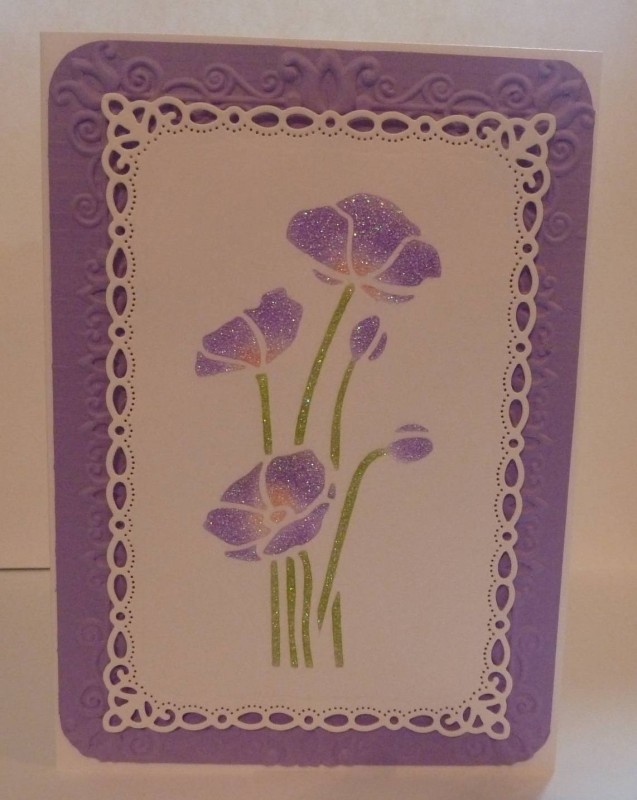
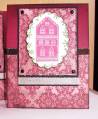
I made 1 card with glass bead glitter gel and I was so excited with the results I needed to make another card with it. NOTE: Be sure to die cut your image panel before using Glass Bead Glitter Gel! Otherwise, the pressure from the die cut machine will push the image into the paper which does not look quite as nice. After die cutting the romantic rectangle, I placed the stencil on top of it, then sponged color into the open areas of the stencil using a finger dauber (I use Post-It notes to mask off areas so I get the color exactly where I want it). I let this dry a few minutes. Still leaving the stencil in place, spread a thin layer of glass bead glitter gel over the stencil and what you colored with the sponges. Remove stencil and let this dry several hours to over night. Each time you do this it will look different so it is a bit of surprise to see what it looks like when it has dried. Fun! Finished the card by embossing the purple layer and rounding the corners. This technique is a little messy, but oh-so-much fun!
Date: Friday, July 8, 2016 GMT Views: 639
Favorited:2