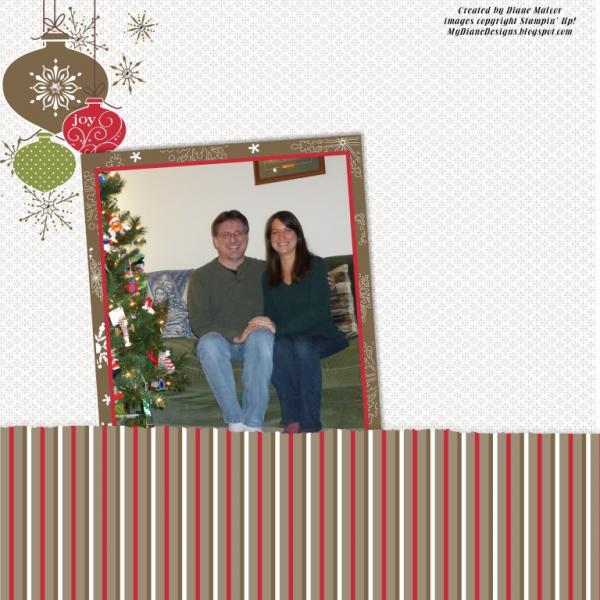
In Task #2, Santa's elf Donna asked us to:
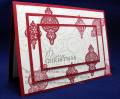
1) Place a photo (or photos) so that the bottom of the photo slightly overlaps or is tucked under your bottom paper strip. Tilt your photo to the left or right.
2) Frame your photo Â… You can use anything that creates a framing effect (frames, mats, masks, ribbons, etc).
3) Further embellish your flat cluster design by adding some dimensional elements to it. It can be anything you wantÂ… word art, flowers, tags, etc. Fasten at least one element with a fastener (button, staple, brad, stitching, etc.)
I added rhinestones to my snowflakes and a pearl to the middle of one ornament.
Supplies Used:
Background paper - Whisper White
Punch - Square (Christmas Cocoa II #3, #7 and #9)
Embellishments - Christmas Cocoa II (ornaments); Basic Pearls and Rhinestones
Stamp Brush Sets - Serene Snowflakes (snowflakes - Soft Suede); Tree Trimmings (string - Chocolate Chip)
Date: Wednesday, December 10, 2014 GMT Views: 531
Favorited:2
Registered: November 16, 2005 Location: Glendale, AZ Posts: 26620
Wed, Dec 10, 2014 @ 2:37 PM
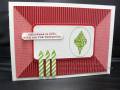
I like the way you have your photo just slightly overlapping the ornament at the top. Your frame is cute too. It's fun to see the ways everyone adds their little touches!
------------------------------ Wendy B in Sunny AZ
This is turning out so well. It's got an elegant yet retro feel... and I too, like how the photo overlaps the ornaments and these colors are fantastic!