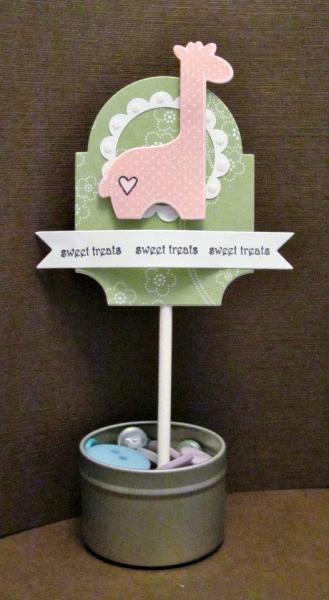
- Die cut 2 identical Matstack 3s in celery DSP
- Die cut desired animal from CS (I used Pink Pirouette) then stamp animal with coordinated ink (I used Blushing Bride)
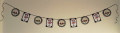
- Die cut larger size banner, stamp 'sweet treats' - Begin with centre phrase & work outwards. If it runs of the ends it just looks more natural
- Stamp the heart onto the 'bum' of the animal, fill it with clear liquid glue, cover in glitter & shake off excess, set aside to dry
- Punch 1 1/2" circle centred on a 2 1/2" piece of white CS, then eyeball the centre of the inner circle & punch out your 1 3/4" scallop circle
- Place dots of clear liquid glue on each 'bump' of the scallop, then sprinkle with glitter and shake off excess. Set aside to dry.
- Working on back surfaces place lots of strong adhesive all the way around the edges of both sides, leaving a 1/2" space at the bottom
- Lie stick in the centre of one of the sides, making sure it's the right length (you need enough to sink into a cupcake!), then flip over the other mat, line the two up & run your finger around the edges to ensure it's fully sealed. Let it dry.
- Glue the white hollow scalloped circle on the upper rounded part of the mat, make sure the sides are even all the way around
- Lie giraffe onto mat & mark a pencil line where the neck will stick out above the mat curve. Place foam dots or squares behind giraffe stopping just before the pencil mark. Erase pencil mark, peel backing off of squares & mount giraffe so it is centred over the scalloped circle and matstack, body slightly below the bottom of the scalloped circle
- Attach 2 foam circles to back of banner. Fold gently inward with fingers to find right bowed distance and 'look' on matstack. Peel backing off foam circles, adhere to one side only, push banner towards stuck down side until it has bowed outward & other side of banner is overhanging the matstack the same out on both sides.
-Press down firmly on all foam adhesive pieces as a final precaution
You're done! Place your toppers into some beautiful pastel-frosted cupcakes and listen to your friends drool over them.
Not hard, but a little fussy and time-consuming. SO worth it! Die cut everything all at once, then do all other steps afterwards. Also, be sure to punch the smaller 1 1/2" circle out of the MIDDLE of the 1 3/4" scallop circle or you'll have a dreadful time trying to punch out even, centred scalloped circles. I did it on more than one occasion (I forget this lesson pretty much every time I make a project like this..lol)!
The little hits of glitter give them that extra bit of sparkle and they look just fantastic tucked into the top of a set of pastel or chocolate cupcakes with pale brown frosting.
Date: Tuesday, October 15, 2013 GMT Views: 7898
Favorited:5
Paper Size: Could probably squeeze the Mat Stack die onto an A1, but I'd stick with A2 for smaller sizes, or just cut 4 from 1 8.5x11 sheet
Ink: Versamark Fine: black, SU: Blushing Bride
Accessories: Big Shot, Mat Stack 3, Sweet Baby, Banner Basics dies, 1 1/2" & 1 3/4" circle punch, fine glitter, clear bonding glue (I use Crystal Effects), glue runner or sturdy liquid glue that won't warp paer, foam squares, large lollipop sticks (candy
Techniques: Die cutting, double punching, stamping die cuts, layering die cuts