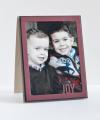
The two dies are sold separately, but work the same way, so let's take a peek. Merry is a horizontally oriented frame, good for those landscape photos. Joy is designed for a portrait orientation. Both are designed to fit a standard A2 card front (4 1/4 x 5 1/2)
To begin, I cut Merry from Steel Grey card stock, and Joy from Paver Red card stock. Then I cut a coordinating matting, measuring 1/8 of an inch larger than the die all around. I'm using the GORGEOUS new Timber Green to coordinate with my Paver Red and the Paver Red to coordinate with my Steel Grey.
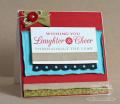
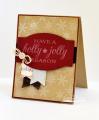
If you were going to be mass producing your holiday cards you could make 100 cards using only one package of MFT card stock foryour frame color, one package for your matting color and two packs of whatever color you'd want for your cardbase.
Now, since a standard photo is 4x6, you'll need to do some cropping and photo trimming to get your image to work within the center of this frame. I have written a tutorial that explains how to specifically size your photos using Photoshop Elements which you can find here. I cropped the image to fit within 4.25 x 5 and then trimmed with paper trimmer for a *perfect* fit.
Tip: To assemble, I recommend applying adhesive to the back of the Merry or Joy photo frame, then laying that over the photo for perfect placement. Then I adhered that to the coordinating matting. I tried adding the photo to the matting and then overlaying the frame, but I must have been over-served where caffeine is concerned because I found that much trickier and had excess photo hanging over.
Date: Tuesday, October 8, 2013 GMT Views: 223
Favorited:2