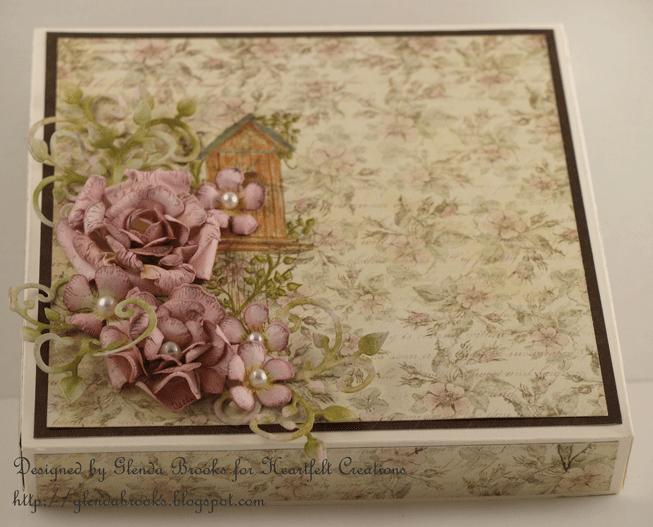
This box will easily hold a 6 X6 card with 3D embellishments. So any flowers and such would be given a little extra protection during shipment. You can just tuck this box into a mailing envelope and off it goes.
Heartfelt Creations Products Used:
HCDP1 234 Daphne Paper Collection
HCPC 3540 Spring Season PreCut Set
HCPC 3406 Botanical Floral 1 PreCut Set
HCPC 3407 Botanical Floral 2 PreCut Set
HCD 735 Gift Ensemble
Other Supplies: Scor Pal Scoring tool, Scor-Tape, cream card stock, Memento ink, Ranger Distress Inks, white card stock, glue, Paper blossoms tool kit, pearls
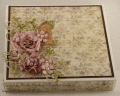
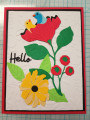
Instructions: Cut a piece of cream colored card stock 8 1/4 X 8 1/4 and one piece 8 5/16 X 8 5/16 so it will fit down over the bottom of the box. Score both pieces of cardstock 1” on all 4 sides using the Scor Pal. Cut the corners on the bottom piece and use Scor-Tape to adhere and make the box bottom. Next cut the corners on the top piece and add the Scor-Tape but do not form the box top. Cut pieces of design paper to fit the sides and the top of the box lid. I stamped the birdhouse on the paper and colored using distress inks. I used Scor-Tape to adhere paper to the top and sides of the box. Now it is time to make flowers. I stamped, cut out and colored the flowers on white card stock. I added color using distress inks and a sponge. Shape the flower petals and form your flowers. Glue together and set aside to dry. Once dry, I glued down the pearls to the centers of the flowers. Cut out the swirls using a piece of the designer paper and lay out on the box top to decide where you want your flowers and leaves to go. Then all you have to do is glue down the flowers and your box is ready to go.
Date: Friday, June 28, 2013 GMT Views: 1301
Favorited:11