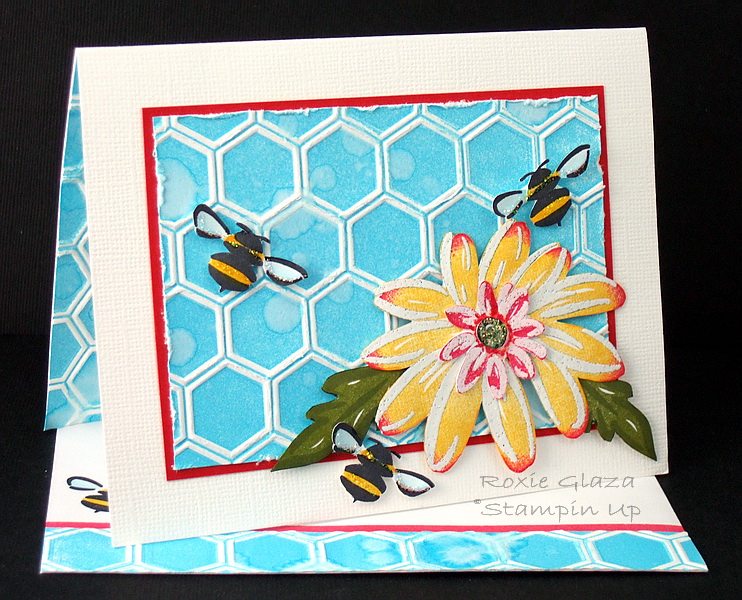
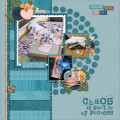
The embossed panelÂ’s color was created using the negative embossing technique where you ink up the negative/flat side of the embossing folder, insert the cardstock and emboss. I did a little twist to the technique and spritzed with water after embossing. Bigger drops of water work better to create the marks so I used a light pressure on the spray nozzle so bigger drops came out. My mister is an old Stampin Up bottle that the stamp cleaner came in and itÂ’s normally a very fine mist. The edge of the panel was tool distressed with a Tonic paper perforator.
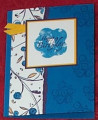
I used the rock and roll technique for the flower, ink up in yellow and rolled the edges on a red stamp pad before stamping and repeated the process using a stamp positioner so IÂ’d get a deeper yellow.
The flower was then embossed using a large metal ball stylus and folded paper towel for cushion. ItÂ’s layered with a smaller flower from the set, Diamond Stickles added and I colored part of the Stickles with the R29 Copic marker because the ink ran on only part of the application. The grey center is a separate image cut out and attached to the small flower center then Stickles added.
The bees are also cut out, body embossed, wings debossed and popped up with foam tape like the large flower. Yellow Stickles was applied to the body stripe and Diamond to the lower portion of the wing.
I did the same embossing technique for the insert and envelope. The piece used for the envelope was also ran through the machine again to flatten it out so it slides through the postal machines without a problem.
The Perfect Layers tools from Perfect Paper Crafting is an excellent way to cut the border. Use any brand craft knife or rotary cutter for cutting. A tutorial video can be found on the company site.
Images: Stampin Up – Daisy (two step – decorative)
Paper: Bazzill white textured, unknown smooth white, Stampin Up Real Red, Beckett Expressions for images
Registered: June 9, 2006 Location: Wauconda, IL Posts: 55665
Fri, Feb 22, 2013 @ 11:41 AM
This is a terrific photo Roxie, and a very beautiful card!!! I love the bright happy colors. I also like how you got bigger drops of water on your card. Nicely done!!
Registered: March 11, 2008 Location: Sacramento, California Posts: 39766
Fri, Feb 22, 2013 @ 1:15 PM
Roxie love your bg! It is super cool. Your whole card is bright and fun. I just love this! TFS :0)
------------------------------ Cathy B aka: Mutnik ....or is it Nutmeg?! I get so confused!
Smile.......people will wonder what you are up to! :0) Proud Fan Club Member 2010 DT forRubbernecker Stamps My Gallery
Splitcoast Artist in Residence Splitcoast Dirty Dozen Alumni Mix-Ability Challenge Hostess
Registered: October 19, 2004 Location: Warsaw, MO Posts: 16987
Sat, Feb 23, 2013 @ 8:29 PM
I love the added interest of the water spots! I don't have very many Distress inks, but I love that property. The blue in the hexagon background is so appealing, too. Thanks so much for playing along!!