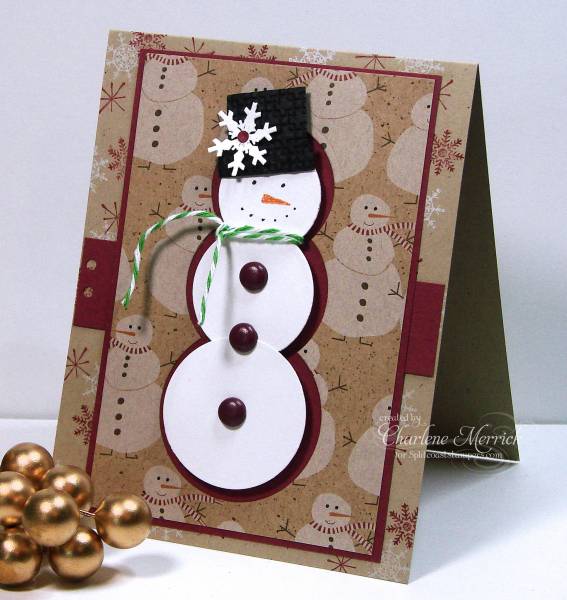
For Joan's Technique challenge to make our own snowman. This was the perfect idea for using my Jillibean snowman designer paper and making this box and card set.
Here's a closer view of the card only.
I made a large snowman for my card and more of a gift tag size for the 3 x 3 box I made following the tutorial in the Tutorials section.
I used various sizes of circle Nestabilities for the snowmen bodies. I used Eva Gray large and small burgundy brads for their bodies. I used rectangle Nestabilities to make my hats. I used a Martha Stewart snowflake punch for the snowflakes on their hats. I used markers for their eyes, mouths, and noses. I used twine for their scarves.
On the card, I die cut the three circles, slightly overlapping them, out of the Jillibean designer paper. Then I added my snowman, popping him up on dimensionals. You can't see it in my photo, but I embossed his hat with the square lattice embossing folder.
For the bottom part of the box and the base of the card, I used snowflake stamps to create a coordinating designer paper with my snowman designer paper.
Stamps: Snowflakes by Rubbernecker
Paper: Baroque Burgundy, Kraft, Jillibean dp
Ink: Baroque Burgundy, Craft White
Accessories: Pumpkin Pie marker, Marvy Black marker, circle and rectangle Nestabilities, snowflake border punch, twine, May Arts silk ribbon, Eva Gray brads, square lattice embossing folder, dimensionals, ScorPal tape, double circle punch
Date: Monday, December 3, 2012 GMT Views: 1779
Favorited:8
Splitcoast Dirty Dozen Alumni Creative Crew SU Design Team Alumni
Registered: October 29, 2004 Location: Coos Bay, Oregon Posts: 24007
Mon, Dec 03, 2012 @ 11:04 AM
OMG Charlene, your snowman card is just a cute as a button :-) TFS your detailed description too. I copied both your card and box. I would LOVE to make this cute snowman for a tag. Thanks again my friend for always inspiring. Happy Holidays...