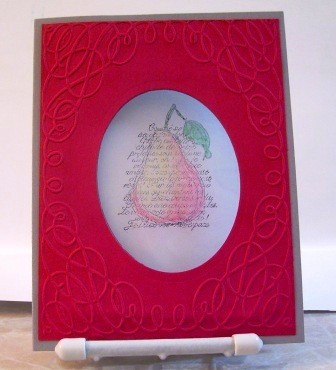
Today's HYCCT challenge is to make a window card. There are lots of styles to choose from and I chose something I've never done before. I cut matching ovals in my gray card base and a red panel. I embossed the red panel. Then I stamped with black ink on a piece of clear acetate, let it dry, tinted the back of the image with green, yellow and pink markers, and sandwiched the piece between the gray and red cs. This is ever so pretty irl! I did learn that I should have let the black ink dry a lot longer as I did smear it some. I also noticed that my oval is slightly off kilter. I blame my vision.
This is the first card I've made with this stamp, which I knew I would love. Oh, when I took the picture, I put a white piece of paper behind the window so the image would show up better.
Date: Thursday, October 6, 2011 GMT Views: 1528
Favorited:5
Splitcoast Dirty Dozen Alumni SCS Gallery Moderator Splitcoast Challenge Hostess Teapot Tuesday TEAm
Registered: July 27, 2007 Location: Dublin, Ireland Posts: 131604
Fri, Oct 07, 2011 @ 9:31 AM
It looks great to me. But I know what you mean, it's very hard to be sure exactly what the centre line through those ovals is when you're trying to cut an aperture. Circles and squares at least are easier, but there are times I think it would be worth making a permanent mark on some of the ovals! I like, too, that your image is still in the front of the card. My issue with window cards where the image is on the inside is that they only look right when they're closed flat!
Splitcoast Dirty Dozen Alumni Creative Crew SU Design Team Alumni Demo Challenge Leader Splitcoast Challenge Host
Registered: February 8, 2004 Location: South of Oklahoma, North of DFW Airport = North Texas! Posts: 44402
Mon, Nov 07, 2011 @ 8:50 PM
This is such a beautiful window! I love the vellum layer ... it adds such distinction! Wonderful colors on that pear as well! Thanks for playing along in my "Looking In On You" challenge!