My wonderful upline showed us how to make this book. Very fun and easy to make. I can't wait to make many more!
Here is what I did, I received these direction via phone from my upline so I may leave something out or you may need to adjust a little bit.
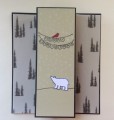
2 sheets of 12 x 12 cut into 6 x 12. Score these at 6 and 6 1/2.
The panel that measures 5 1/2 is the middle, Adhere that on top of 6 1/2 panel. The two sheets become a tri-fold.
Your paper should measure 6 (score) 1/2(score) 6 (score) 1/2 (score) 5 1/2
Repeat these steps with the other paper and carefully layer wrong sides together.
You will now need some medium size envelopes.
Fold the flap backwards and adhere to the front of another envelope continue to layer until you have any many envelopes are you want (I used 5) Then place a dimensional at the bottom of the envelopes. On the last envelope (bottom of the stack) apply adhesive and place in the middle section of the book.
Cut some cardstock to 4 1/4 to 5 1/2 for the inserts and decorate.
Hope that makes sense, I am not the best with writing directions :-)
On my second book, I used Cardstock for the base and layered the patterned paper on top with the hopes that the book will not wear so quickly. Also, I scored one sheet then scored the second one after I adhered it the first sheet.
Date: Saturday, January 14, 2006 GMT Views: 524
Favorited:11
Registered: April 5, 2003 Location: Whidbey Island, WA Posts: 22041
Sat, Jan 14, 2006 @ 10:28 AM
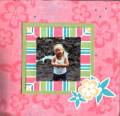
Oh, how sweet! I love how you mitered the edges on the striped paper that frames the photo! And, that child cuter than a bug's ear!!!! :grin:
------------------------------ Julie Ebersole (JulieHRR once upon a time . . . )julieebersole.com"So shines a good deed in a weary world." -Willy Wonka