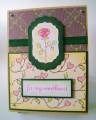
Embossing folders were used to emboss the card front, a border inside and the envelope. For the envelope I also used the newest Scor-Pal with more 1/8” spacing and embossing with this tool will often solve the problem of the line made by the embossing folder. If possible for example the dots inside, I emboss only until it goes over the dots and back it out again rather than rolling completely over the folder.
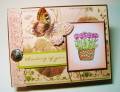
-Prismacolor pencils, baby oil and paper stumps were used to color the image using the Gamsol technique. Baby oil replaces the Gamsol/mineral spirits.
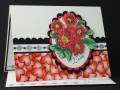
-The pearls are attached with Diamond Glaze (any lacquer product will work). To make the process fast and easy I squeeze a drop of lacquer onto a waxed paper (I repurpose the paper that stickers and labels are purchased on), touch the end of a large corsage pin to the lacquer then to the back of the embellishment which picks it up, position it on the card and press down with a finger, there is a little time to slide the embellishment into position if needed before it sticks tight.
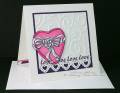
-For the inside I cute strips of cardstock and glued it to the card base and glued on the hearts which were the negative pieces from the border punch used on the card front.
-A2 sized envelope for the square card:
I always use an A2 sized envelope for my square cards so I don’t pay extra postage. I cut a piece of junk cardstock 4.25 x 5.5” and to make it easier to pull the card out of the envelope I punch a shape (usually a V/half square or Stampin Up photo corner punch) at the half way point of the top edge as long as embellishments aren’t directly underneath because this cardstock also acts as reinforcement/protection for embellishments as it goes through the sorting machines.
If you donÂ’t have a suitable punch just cut the V with scissors.
Dot some glue about ¼” from each edge and tuck it in the envelope so the glue sticks to the front of the envelope. Then the card tucks in between the envelope front and the cardstock and doesn’t shift around during travel.
A tutorial with photos can be found on my blog here.
For a direct link to see better view of the inside and envelope click here.
Registered: April 6, 2005 Location: Stuarts Draft, Virginia Posts: 14401
Fri, Jan 14, 2011 @ 10:03 AM
Never thought to emboss the envy but what an awesome idea! Love your heart-filled creation!
------------------------------
Wanda Cullen ~ Dirty Dozen Alumni, On design team for Papertrey Ink, Designer for Color Throwdown and Fusion Card Challenges Cullen-ary Creations[/URL]...my blogHERE'S MY GALLERY[/URL]
Registered: March 11, 2007 Location: In my Garden in West Jefferson, Ohio Posts: 4278
Fri, Jan 14, 2011 @ 11:33 AM
I would just like to come and set at your craft table and soak up all of your wonderful talent !!!
Thanks for sharing it with the rest of us................
------------------------------
GardenDiva AKA Tina DeLong
FS363 QFTD182
Fan Club Member & Tuesday Teapotter Hostess MMTPT222
Thyme began in a Garden. Jeremiah 29:11
Registered: January 11, 2010 Location: Miamisburg, OH Posts: 7227
Fri, Jan 14, 2011 @ 11:34 AM
Your card is GORGEOUS!!! LOVE what you've created for the challenge!!!~
------------------------------ "Art is the most intense mode of individualism that the world has known." ďż˝ Oscar Wilde
My Blog: http://jennabeecrafts.blogspot.com/
Registered: August 21, 2007 Location: Wayland MA Posts: 105272
Fri, Jan 14, 2011 @ 11:35 AM
Love all the EF's you used for this card!
------------------------------ Anne HarmonFS154, QFTD58, PROUD FAN CLUB MEMBER (photo of our Great Granddaughter Elise, just 6 months old) and me, even older.