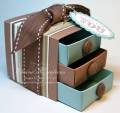
This is my first attempt at making the adorable matchbox dressers. I LOVE them! SO cute! I don't have a Big Shot, so I use my Cuttlebug and a Crease Pad along with the Sizzix/SU Bigz XL Matchbox Die. For the drawer, I use a piece of cardstock/DP 5.25 x 6.25 and for the outer shell of the matchbox I use a piece that is 6.5 x 3. Since these dressers are 3 drawers - I did all that times 3.
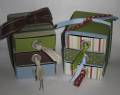
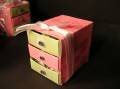
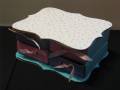
I'm uploading 5 photos including the "T" template for the wrap, the finished dressers and also the back side of one and what it looks like.
I had made a practice dresser (not pictured) and my 8 year old son thought it needed a piece of paper covering the opening in the back so that the drawers didn't get pushed through. I thought that was a GREAT idea so I created the "T" template and took a photo to try and show the dimensions and also where I scored it. I made it so that part of the drawers/shells show through a bit in the front and a bit behind (see pictures for what I mean) - but if you prefer to have this T wrap cover ALL of the drawers/shells then you could make the cross of the "T" 2 and 5/8 wide instead of just 2 inches. (Hope that makes sense)
On my first practice dresser (not pictured) I tried using brads for the drawer "handles" because I think they are so pretty (the corduroy or just decorative brads), but because I wanted these drawers more than pretty - but very functional to open/close - I felt the eyelet/ribbon combo was the most functional for ease of opening/closing the drawers.
I made sure to do the eyelet/ribbon stuff before completely folding the drawer box all up so that the backside of the ribbon and eyelet were hidden under the flap inside the drawer. I used sticky strip adhesive to make sure that flap stayed down. I also used strip adhesive (peel off the red film) to adhere the 3 drawers to each other.
Thanks for looking and let me know what you think!
Date: Saturday, July 11, 2009 GMT Views: 951
Favorited:9