Registered: January 14, 2004 Location: Norfolk, Virginia Posts: 2051
Thu, Jun 17, 2004 @ 6:24 PM
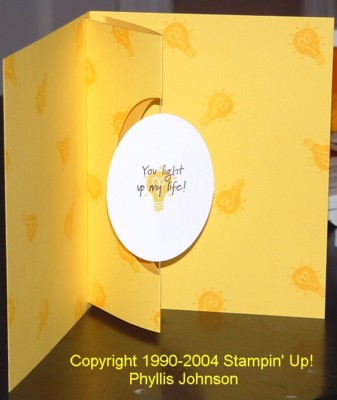
Here you go (and Beate, I can't do instructions as good as you .. ha ha)
Bottom of card is standard, 5-1/2� x 8-1/2� (folded to 5-1/2� x 4-1/4�). For the insert of card, cut a piece 5-1/4� x 4-1/2�. Fold it in half (5-1/4� x 2-1/4�). Score in �� on each side (from top to bottom). These are the flaps that will fold in and attach to bottom of card. On the insert, use your coluzzle to cut an oval. On a scrap piece of US White, cut two smaller ovals. Using unwaxed dental floss, attach to back side of insert, tightly. I used Crystal Effects to adhere it (took a little long to dry, but it�s worth it). Attach the US White pieces with the dental floss in between. Mount the inside to the bottom of the card.
Registered: April 29, 2003 Location: Edmond, OK Posts: 19297
Thu, Jun 17, 2004 @ 7:27 PM
Phyllis. What are you talking about. Your instructions are awesome. And that coming from a person who usually doesn't get instructions the first time. I can't wait to try it. Hm.....what set should it be? Did I mention that I love this card?
Registered: March 6, 2004 Location: Cooley Ranch, California Posts: 645
Fri, Jun 18, 2004 @ 8:43 AM
Oh... your card is beautious..... I saw a card made with this pattern my upline got on the cruise... It is even cuter & more fun in person... what fun... I can't wait to make some.. Oh where will we find the time to case everyone's cute ideas... you guys are awesome! Soooo many ideas so little time. Thanks jennie
------------------------------ Jennie Eger Black
Alcohol Marker Specialist & Education instructor for Spectrum Noir
JennieBstampin.blogspot.com