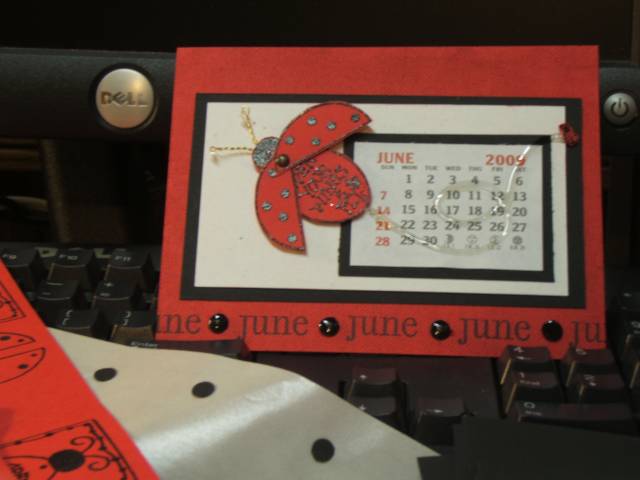
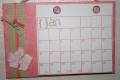
For the past three years I have joined a local "calendar swap" This year the size is invitation size. We were provided with the mini calendar and asked to create a card front around it. These will be bound at the top, so I had to leave that area clear for the bind-it-all punch and wires that will go there.
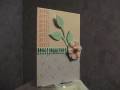
The ladybug stamp is one that I bought at a rummage sale, all the identification is worn off, so I don't know who it is made by. It's totally cute and I can see why the wood block was so well loved. It is an interactive image with two parts. The first part is the body, then the wings. When you cut them out and use a brad, they are movable! (Yes, I left them movable, just tightening the brad a little so they will stay in place if you want to leave them open, as pictured.) I just used an embossing pad and black embossing powder and made a dozen impressions of the bug (I'm making 12 of these little cuties). I cut them out (ouch my achin' fingers!). Then I took craft wire and a couple of beads; bent, twisted and affixed them to the back of my bug. Next I added 3-d mounting tape to him. Setting my main image aside, I stamped the background with linen, then added all my layers. I stamped the word June at the bottom leaving a space to add 1/4" hole punches for my polka dots. Now I added my bug to the card front and lastly added crystal lacquer, both on the polka dots and then as a trail over the top of my mini calendar. Totally, totally, putzy, but oh so cute! I hope the ladies I'm swapping with will like him!
Date: Friday, August 8, 2008 GMT Views: 865
Favorited:4