Treat Box
by Beate Johns
Stuffed full of candy, cookies or potpourri, this easy-to-make box is sure to be a hit!
Supplies
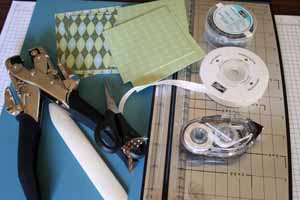
- Paper cutter with scoring blade
- One 12"x12" piece of cardstock
- Eight 3 3/4" squares of Patterned Paper A
- One 3 7/8" square of Patterned Paper A
- Eight 3 7/8" squares of Patterned Paper B
- Adhesive
- Eight Eyelets
- Crop-a-dile™
- Ribbon
- Bone Folder
Step-by-Step
-
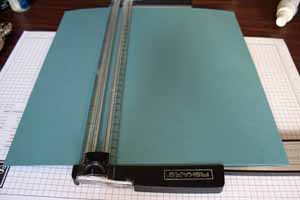
Step 1
Score 12" x 12" cardstock at 4" and 8".
-
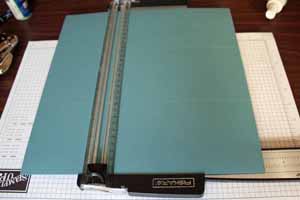
Step 2
Turn cardstock 90 degrees and score at 4" and 8".
-
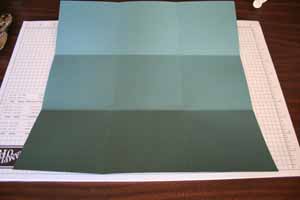
Step 3
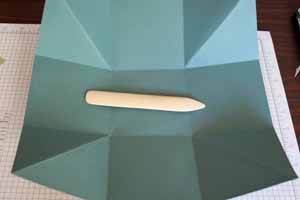
Prefold all scores.
-
Step 4
Fold one corner square over to a center square to create a diagonal fold in the corner square.

-
Step 5
Add a diagonal fold to all four corner squares.
-
Step 6
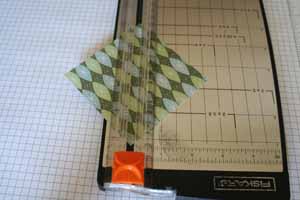
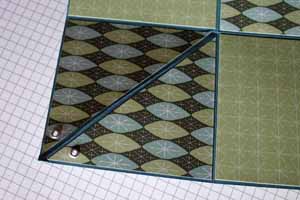
Cut all 3 3/4" patterned paper squares in half diagonally.
-
Step 7
Tape the triangle shapes to the outer squares and tape the 3 7/8" paper squares in Pattern B to the scored squares of the box inside.
The one 3 7/8" square of the Pattern A paper goes in the center of the box.
(The inside of the box is the side that has the diagonal fold going in.)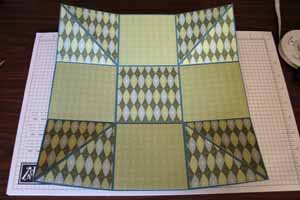
-
Step 8
Flip cardstock and decorate the outside.
There's no need to add patterned paper to the center panel as this will be the bottom.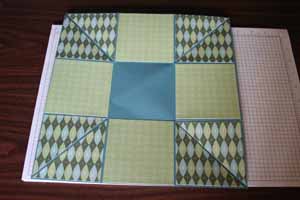
-
Step 9
Punch a hole in each of the outer corners.
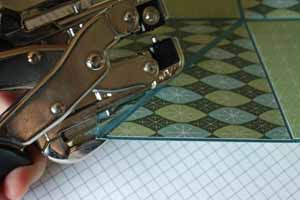
-
Step 10
Add an eyelet to each of the punched holes.
-
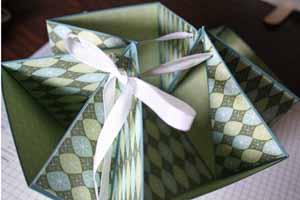
Step 11
Thread a 24" piece of ribbon or cord through the eyelets and tie to hold the box together.
-
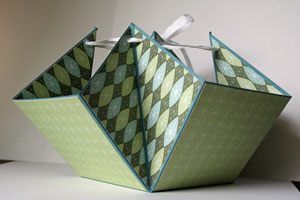
Step 12
Finished box.
Video!
Variations
Fill it up
Add candy, cookies or potpourri.
Different sizes
Start with any perfectly square cardstock square, then score at 1/3 and 2/3 the length of your square. For example, when starting with a 9" square, score at 3" and 6".
Your Turn
You've seen the tutorial, now you try it! We've got a section of the gallery set aside for Treat Box. Try this technique, then upload your artwork to the gallery. Show us your creations!
***Please note - Internet Explorer/Edge is not a supported browser, and will not allow you to see the videos. Please use Chrome, Firefox or Safari to view our tutorial videos.
Questions and Comments
We'd love to get your feedback or questions. Leave your comment below.
One question though - on the example directions for the alternate sizes for a 9" square, shouldn't that say score at 3" and 6", not 9"?
Daven - FYI...instructions printed beautifully
Thanks so much.
Susan
Page 1 of 3 pages 1 2 3 >