Paper Clip Bookmark
by Beth Silaika
Embellish jumbo paperclips for a fun desk accessory or bookmark.
Supplies
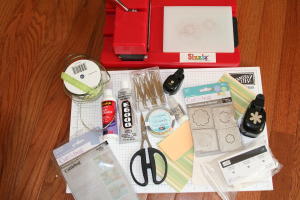
- Chipboard (medium or lightweight)
- Paper scraps (cardstock and patterned paper)
- Sanding block
- E6000® or other strong adhesive
- Jumbo paper clips (available at most office supply stores)
- Die cut machine and dies
- Paper punches
- Ribbon, buttons, or other embellishments
- Scissors
- Glue such as Scotch® Quick-Dry Tacky Adhesive
Step-by-Step
-
Step 1
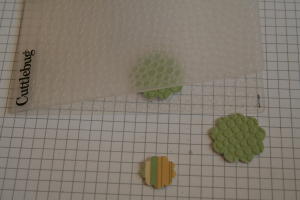
Die cut shapes from chipboard using dies and die cut machine according to machine directions.
Note: If you do not own a die cut machine, try using thinner chipboard and cutting shapes with scissors.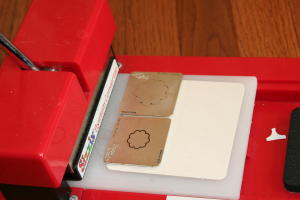
-
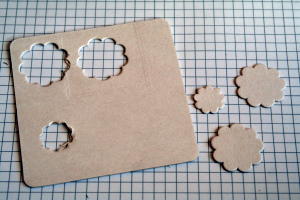
Step 2
Cut two large shapes for front and back of clip as well as one smaller shape.
-
Step 3
Die cut two large and one small of the same shape from Step 2 from paper scraps.
Mix and match patterned paper and cardstock for a fun look.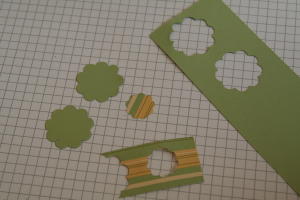
-
Step 4
For added texture, dry emboss cardstock shapes with a pressure embossing folder.
-
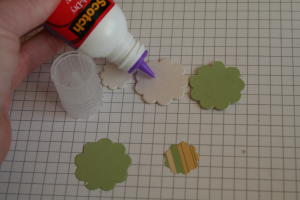
Step 5
Adhere paper shapes to chipboard shapes with glue. Scotch Quick-Dry Tacky Adhesive was used here.
-
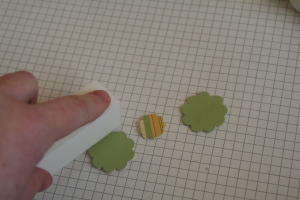
Step 6
Sand edges of chipboard shape if desired.
-
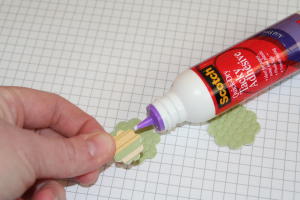
Step 7
Adhere small chipboard piece to one large chipboard piece with glue.
-
Step 8
Embellish smaller chipboard piece with ribbons and buttons.
For variety, try brads, eyelets, Stickles™ and/or stickers.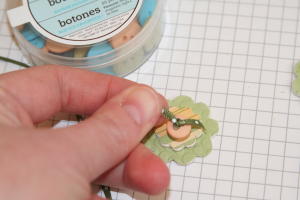
-
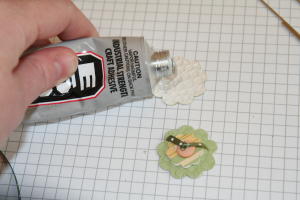
Step 9
Apply strong adhesive to undecorated side of larger chipboard shape. (E6000 was used here.)
-
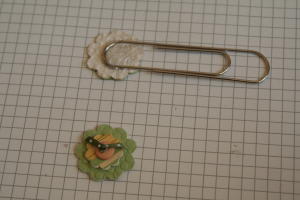
Step 10
Place jumbo clip into adhesive.
-
Step 11
Top with embellished chipboard shape.
-
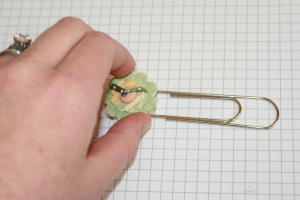
Step 12
Allow at least one to two hours to dry, then add some ribbon to paperclip.
-
Step 13
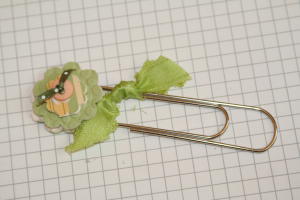
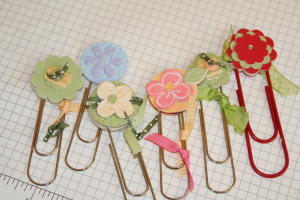
Finished project.
Video!
Your Turn
You've seen the tutorial, now you try it! We've got a section of the gallery set aside for Paper Clip Bookmark. Try this technique, then upload your artwork to the gallery. Show us your creations!
***Please note - Internet Explorer/Edge is not a supported browser, and will not allow you to see the videos. Please use Chrome, Firefox or Safari to view our tutorial videos.

Questions and Comments
We'd love to get your feedback or questions. Leave your comment below.
only marketed by walmart it says on back.
I do not find them hanging up with rest of paperclips they are usually on the shelve underneath. Hope you find them. perfect size!
Thanks,
Lisa
Hopefully you clicked the button for updates for this tutorial
Here's a link to the Cuttlebug die for these:
http://store.scrapbook.com/nm-37-1206.html
It's one of Cuttlebug's original die sets, has four 2" square dies, and is just called 'Flower'. Available most places online, and I know that my local Michael's still carries it, too. HTH!
http://herhobbyaddiction.blogspot.com/2009/08/three-word-thursday.html
I will make these for sure!
Thank you.
Page 1 of 2 pages 1 2 >