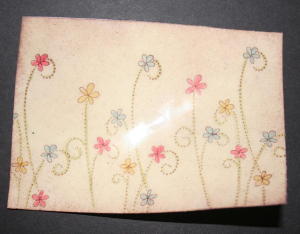
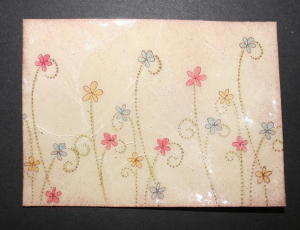
Cracked Glass
by Beate Johns
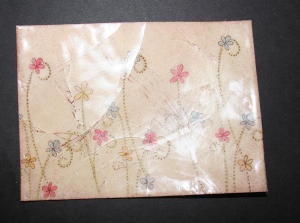
Layers of Ultra Thick Embossing Enamel (UTEE) give your stamped images an antique look.
Supplies

- Glassy Glaze™ (Ultra Thick Embossing Enamel) or clear embossing powder
- Heat gun
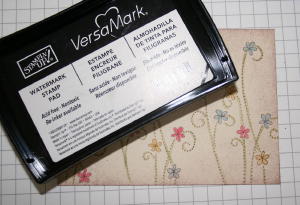
- VersaMark™
- Dye ink
- Cardstock
- Sponge (optional)
- Powder Pals® (optional)
Step-by-Step
-
Step 1
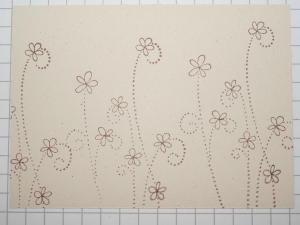
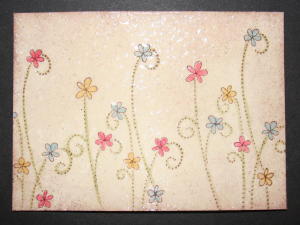
Stamp image on cardstock.
-
Step 2
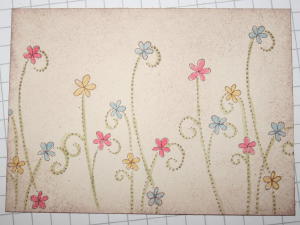
Add color and sponge as needed.
-
Step 3
Apply VersaMark™ over the entire piece of cardstock
-
Step 4
Place your cardstock into your Powder Pal™ and pour Glassy Glaze™ over it.
If you don't have Glassy Glaze or other UTEE, use crystal clear embossing powder.
If you don't have a powder pal, use a sheet of copy paper.
Cover entire image and tap off excess powder.
-
Step 5
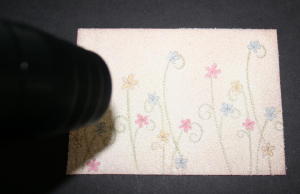
Heat powder with heat gun until melted.
-
When you are done, your cardstock should be covered with a bumpy, linoleum-like layer of Glassy Glaze.
-
Step 6
While the Glassy Glaze is still hot, add more powder over the cardstock.
Hint: If the layer of Glassy Glaze has cooled, don't worry. Either reheat, or apply another layer of VersaMark before adding more Glassy Glaze.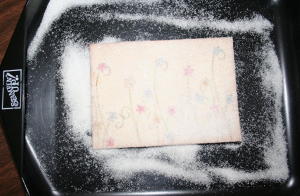
-
Heat again until melted. The second layer will have a smoother look
-
Step 7
Repeat step 6.
If you use regular embossing powder, repeat at least two more times.
After heating the last layer of embossing powder or Glassy Glaze, put the cardstock in the freezer for a minute or two to completely cool. When you take it out, the cardstock may be slightly warped. That is perfectly okay.
-
Step 8
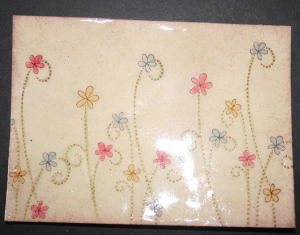
Bend cardstock carefully until embossed layer cracks. Repeat on different spots of your cardstock until you like the look of it.
-
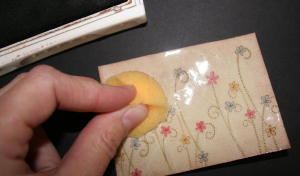
Step 9
If you'd like the cracks to show more, sponge dark colored ink over the entire image. The ink will get into the cracks, making them look more prominent.
-
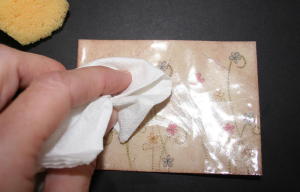
Step 10
Buff image with a paper towel to pick up the ink that didn't seep into the cracks.
-
-
Step 11
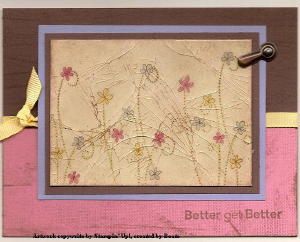
Finish your card. .
Video!
Your Turn
You've seen the tutorial, now you try it! We've got a section of the gallery set aside for Cracked Glass. Try this technique, then upload your artwork to the gallery. Show us your creations!
***Please note - Internet Explorer/Edge is not a supported browser, and will not allow you to see the videos. Please use Chrome, Firefox or Safari to view our tutorial videos.
Questions and Comments
We'd love to get your feedback or questions. Leave your comment below.
Amy - I well remember the magic of a young son at the age of 11. Tell him thanks for this great idea.
So far I always used waterproof ink to stamp my image and colored it in. I usually send out my cards, but I never heard anything back that the image faded. Sorry!
Is that a Staz-On type of ink?
Can you explain that step abit more?
Thank you.
It means after you stamp your image and you want it colored and sponged, do it now. Because after you add clear embossing powder over it, you can't do that anymore.
i put it in the bin as being a newbie i just thought id done wrong,,lol now i know im off to play,,, thank you,, theses hops are ready helping me,,, you gal's are just was too cool xxx
Page 1 of 2 pages 1 2 >