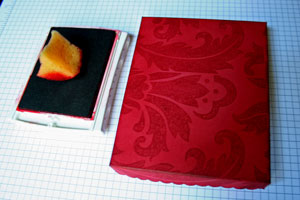
A2 Card Box
by Beate Johns
Create this box with matching lid to hold sets of cards or other goodies.
Supplies

- One 7 3/4" x 9" piece of cardstock for your box base
- One 6 7/8" x 8 1/8" piece of cardstock for your lid
- Scor-Pal™ or other scoring tool
- Scor-Tape™ or other strong adhesvie
- Scissors
- Stamps
- Ink
- Ribbon
- Additional cardstock and embellishments to decorate your box
Step-by-Step
-
Step 1
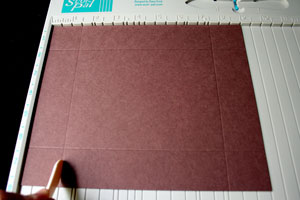
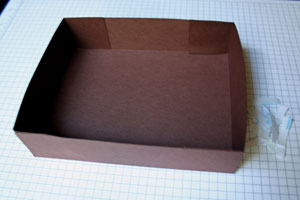
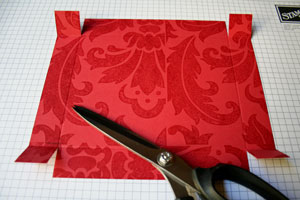
Score your 7 3/4" x 9" piece of cardstock at 1 1/2" on each side.
-
Step 2
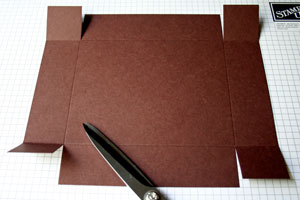
On the long sides of the cardstock, cut the score lines up to the point where they connect with the score lines from the short side.
-
Step 3
Prefold all your score lines.
-
Step 4
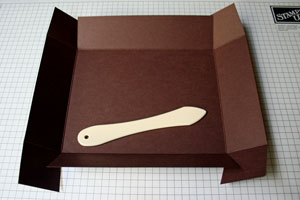
Apply Scor-Tape™ to each of the four outside corners. These are your glue tabs.
-
Step 5
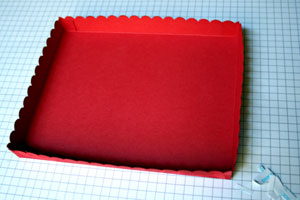
Peel off the paper lining of the Scor-Tape™ and fold in the glue tabs to create the bottom of your box.
-
Step 6
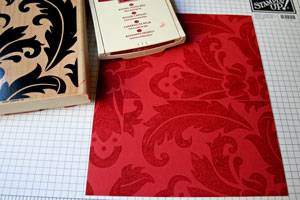
Stamp your 6 7/8" x 8 1/8" piece of cardstock if needed.
-
Step 7
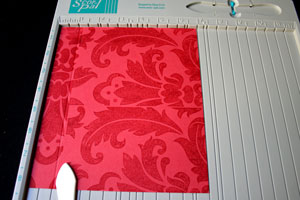
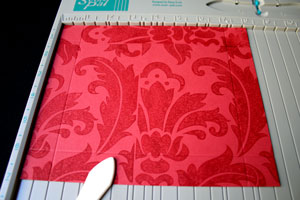
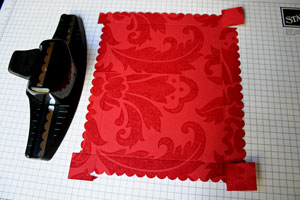
Score the cardstock at 1".
-
Repeat scoring the cardstock piece at 1" on each side.
-
Step 8
As in step 2, cut the score lines of the long side to the point where they connect with the score lines of the short side.
-
Step 9
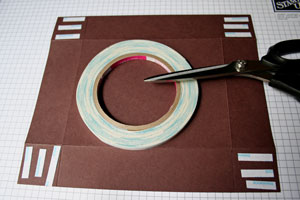
Punch each side with your Scallop Edge Punch. No need to punch the glue tabs.
-
Step 10
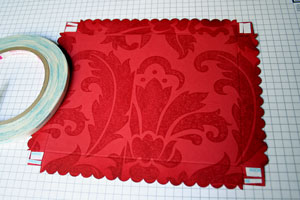
Cut down your glue tabs so they won't show under the scallops. Add Score-Tape™ to each of the four corners.
-
Step 11
Prefold your score lines. Peel off your paper liner of the tape and fold the glue tabs in to finish the lid of the box.
-
Step 12 (Optional)
Add more color and depth by sponging the edges of your lid.
-
Step 13
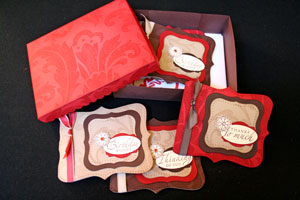
Fill your box with either matching cards or other goodies.
-
Step 14
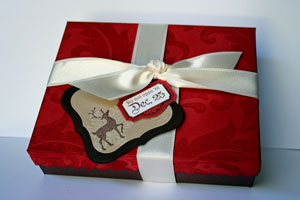
Tie ribbon around your box and decorate as desired.
Video!
Variations
-
Be a show off
Create a clear lid by substituting clear cardstock or acetate for your lid cardstock.
Any size
You can make the box any size you want. Determine the size of your base. Determine the height you want, and double it. Add this number to the length and width of the base.
For the lid, add 1/8" to your base size. Calculate the measurements for the sides in the same way.
Example: You want to have a 4" square box that is 3" high. You will need a 4" + 3" + 3" = 10" square box base. Score at 3" from each side.
The lid will be 4-1/8" with a 1" drop. 4-1/8" + 1" + 1" = 6-1/8" square. Score at 1" from each side.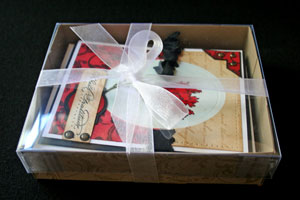
-
Pizza box as substitute
Try a pizza box instead. You will need a 7 1/2" x 11 3/4" piece of cardstock.
Score at 3/4" and 6 3/4" on the 7 1/2" side.
Score at 3/4", 5 1/2, 6 1/4" and 11" on the long side.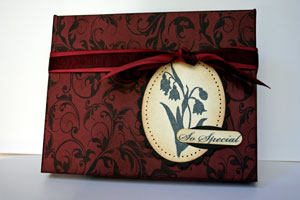
Your Turn
You've seen the tutorial, now you try it! We've got a section of the gallery set aside for A2 Card Box. Try this technique, then upload your artwork to the gallery. Show us your creations!
***Please note - Internet Explorer/Edge is not a supported browser, and will not allow you to see the videos. Please use Chrome, Firefox or Safari to view our tutorial videos.
 *
*
Questions and Comments
We'd love to get your feedback or questions. Leave your comment below.
PJ
Thanks so much for posting this !!!!
This is one of the items I'm planning to make this season, and I appreciate the clear directions!
Thanks again!
Thanks again, and happy stamping!
Is there a tutorial on making a card box that is vertical instead of horizontal?
The cardstock for the lid is smaller, but since you are only scoring it 1" in, instead of 1 1/2" on the bottom, the lid is actually 1/8" bigger then the bottom.
Thanks so much for all you do, Beate!!!!
Can you help me with that? Thank you
Is your scoring tool in inches or metrics? If it's inches, the 1/8" mark is the middle between 0" and 1/4", the 5/8" between 1/2" and 3/4".
Not sure about the metric measurements. You would have to convert it. There should be some conversation formula online somewhere. I think one inch is 2.54 centimeters....or something around that.
Happy Holidays
Page 1 of 5 pages 1 2 3 > Last »